By Justin Gerard
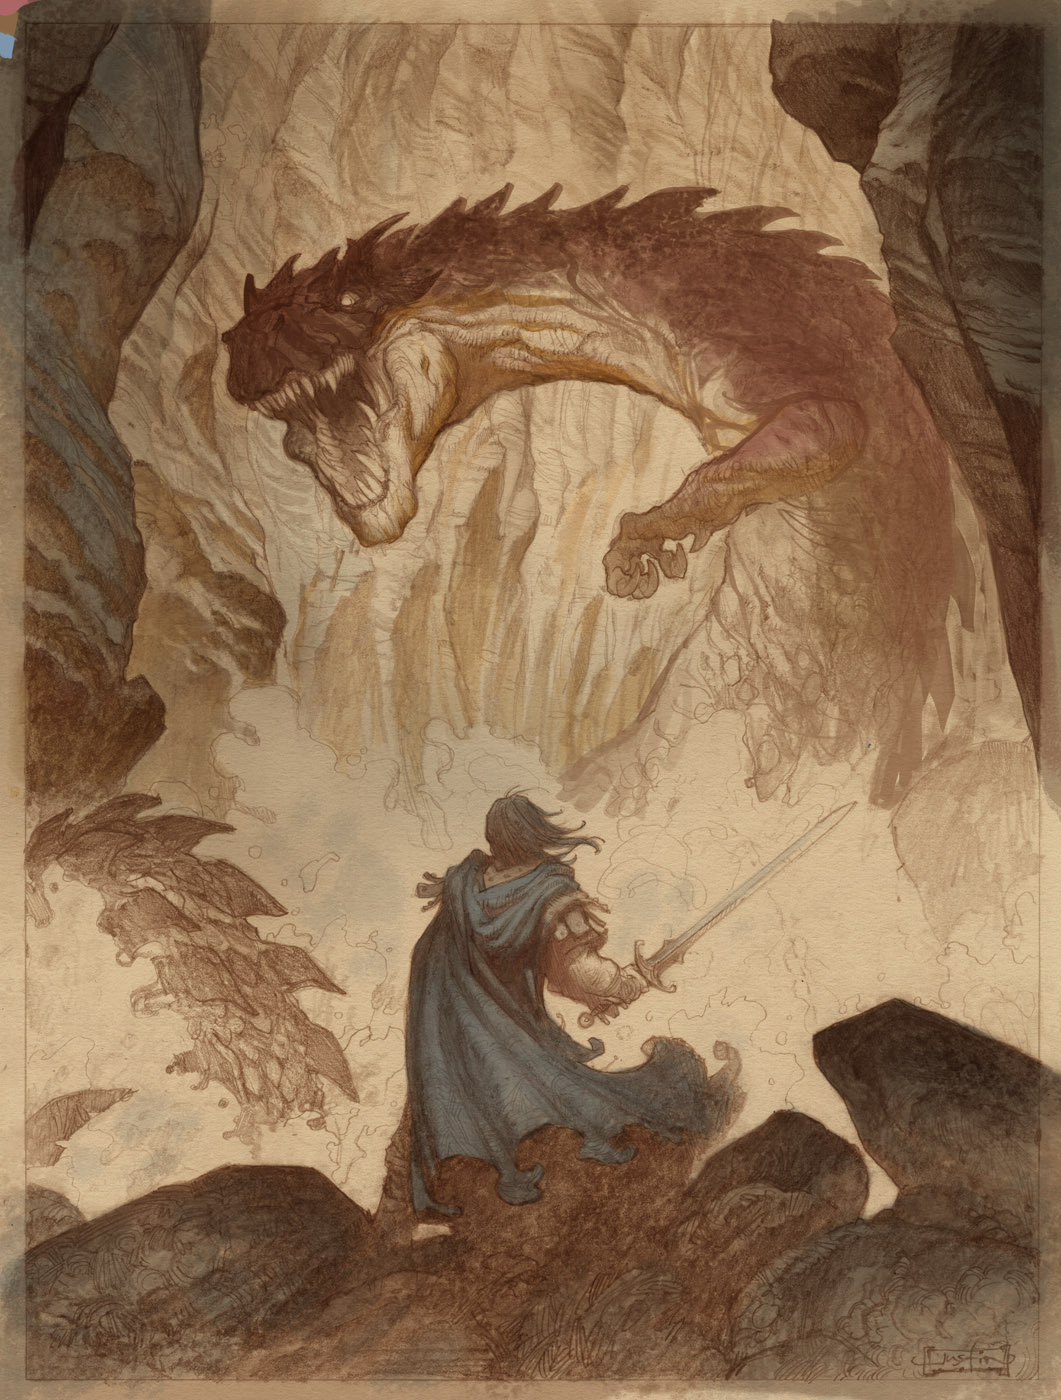
In the last post, I focused on the traditional aspects of my process for watercolor and digital. This week, we focus on digital hocus pocus used to complete these pieces.
My digital process is mainly derived from the Dutch-Flemish indirect manner of working.
If I travelled back in time and gave the Dutch-Flemish painters an Imac with Adobe Photoshop CS5 on it and a Intuos 4, they might have promptly thrown it all in the lake and then painted an unflattering picture of me as a fruit basket. But then again, they might decide that their methods work well regardless of what medium they are executed in and they would go on to make some awesome work with the new tools.
The process I follow mainly involves first laying in the shadows transparently, and then working in the highlights opaquely on top of them. This is then followed by adjusting the colors and details.
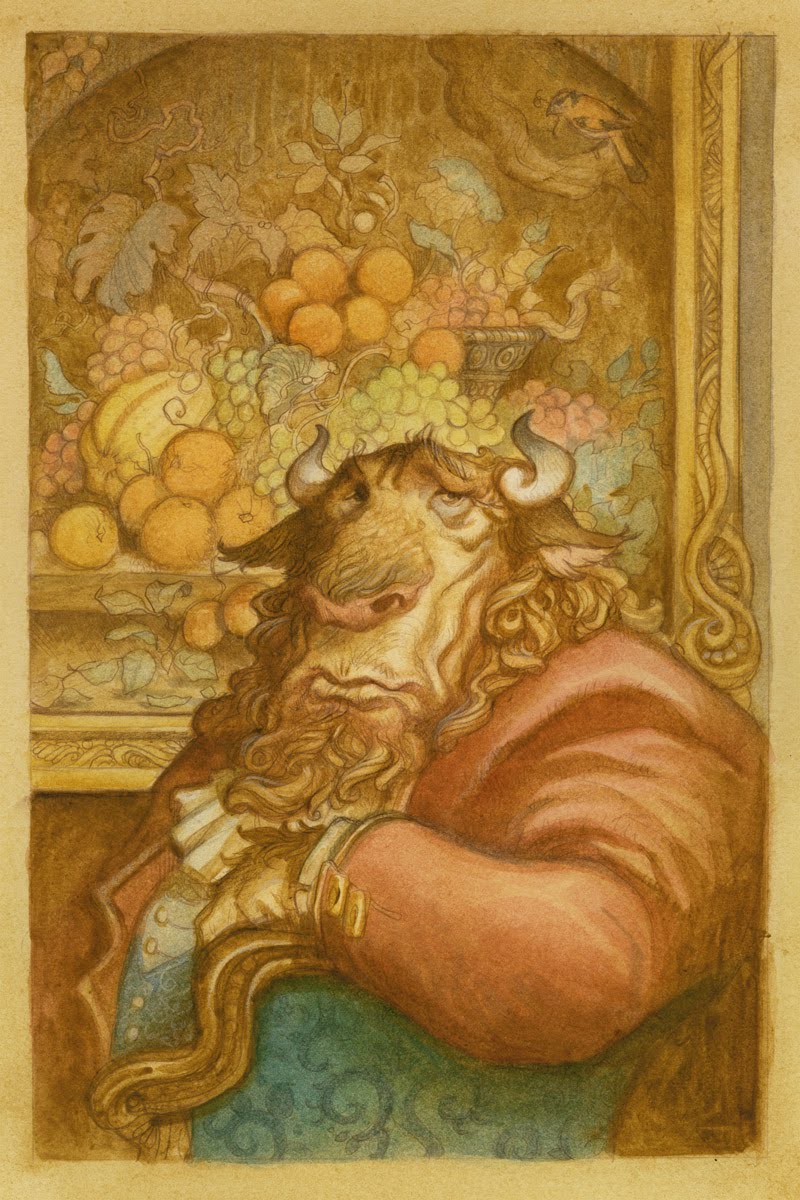
I have an ancient Epson flatbed scanner, one that primitive man invented sometime after fire, but before the wheel. Like most stone-age equipment, it is quite reliable, but it does tend to get its colors off just slightly. The image always seems lifeless and dead to me after it has been scanned.
This first stage is just to get the image back to what it looks like to the naked eye in soft light.
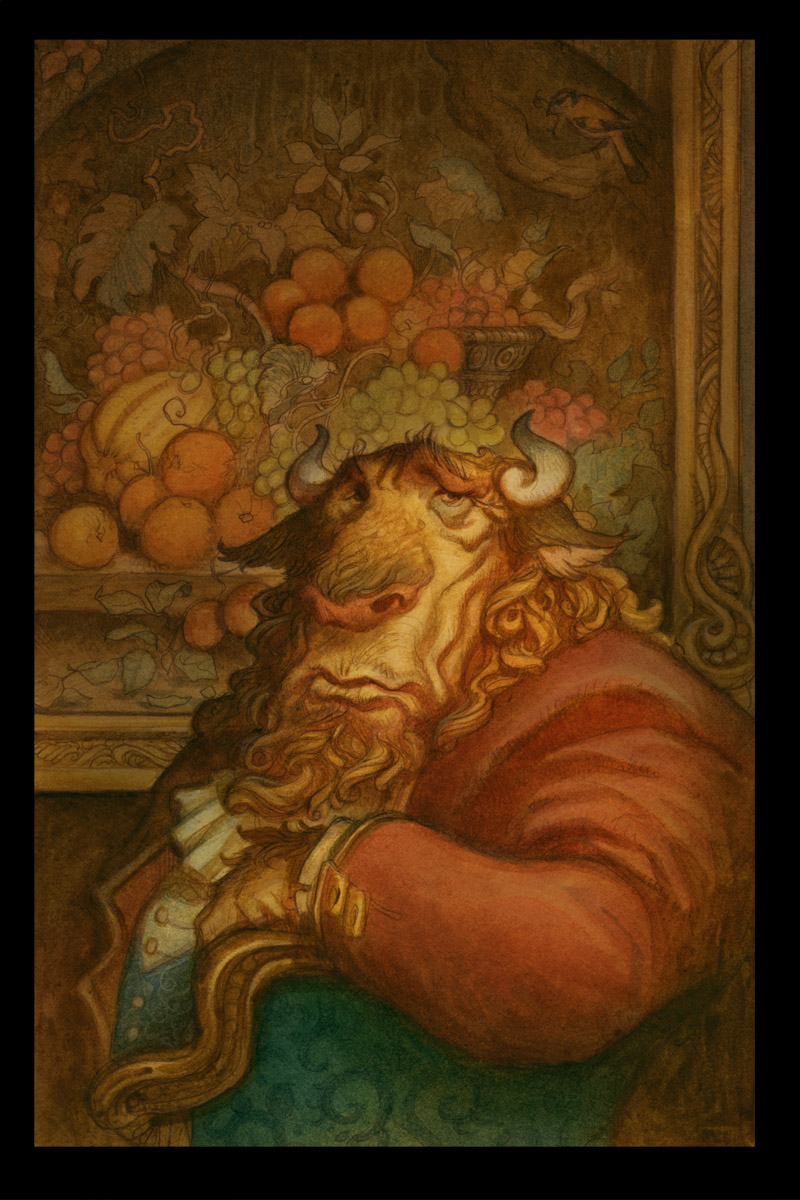
I work purely in multiply layers to establish the dark areas and shadow details. I work this up to slowly to kind of explore the nuances of the lighting in the image. This chance to explore the lighting is one of my favorite aspects of working digitally.
I use multiply (set to zero black) to add the color. You can use any of the other modes to achieve color, (color, soft light, hard light etc.) I just prefer multiply because it behaves a little more predictably and because it tends to look a little more natural over a traditionally painted image.
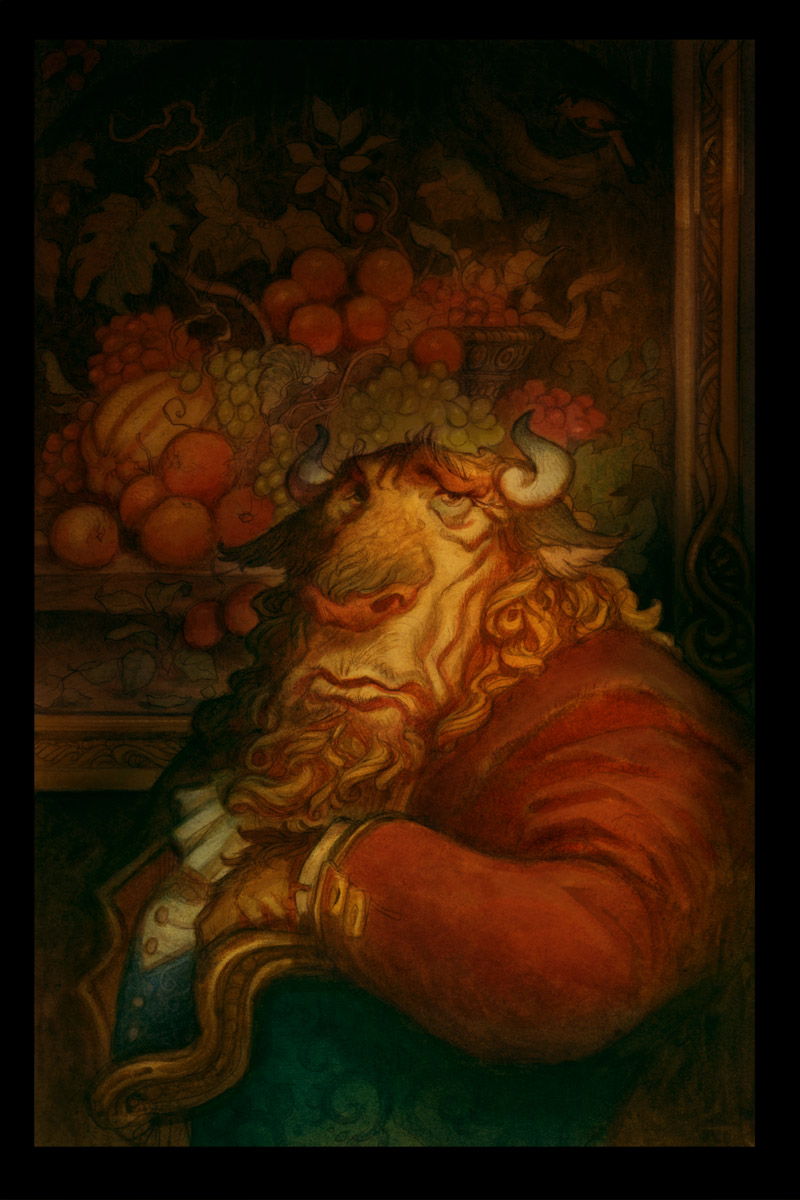
After working up the shadows to a satisfactory level of darkness, I work highlights in to slowly refine the shapes and give them more dimension. As in the Dutch-Flemish manner, I tend to work opaquely at this point, and generally stick to the areas that are being lit.
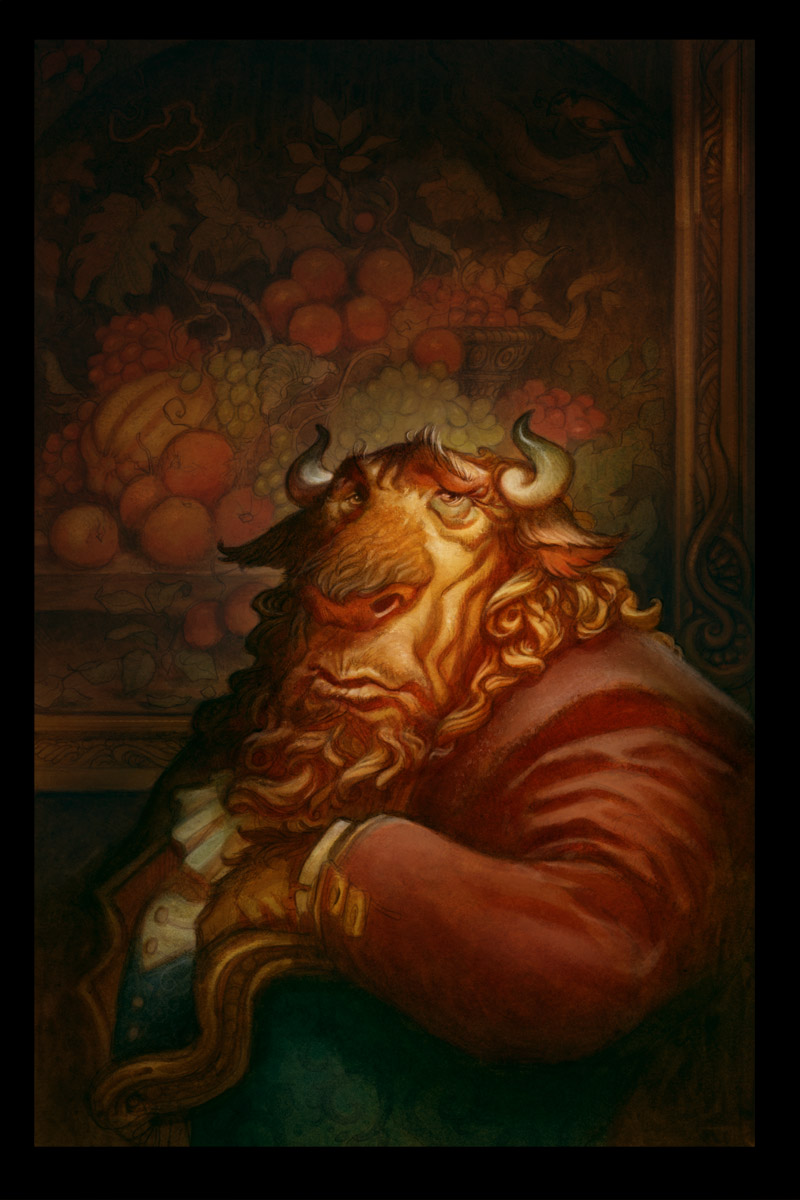
Color Adjustments & Final Details
For the final details I work with normal layers to sharpen up details and focal points. I try not to overwork the whole image at this point though. This is both a blessing and a curse with digital. Since you can essentially zoom in forever, you could feasibly spend the rest of your existence refining every little hair. At some point you need to make decisions about what needs to be refined and what can be left a little vague.


Awesome post, Justin.
What adjustment layers do you work the highlights in?
Justin,
Do you retouch-out little specs and blemishes and other hickeys or do you leave them? I find it frustrating to scan an image which looks good to the naked eye only to see lots of little imperfections upon using the zoom tool.
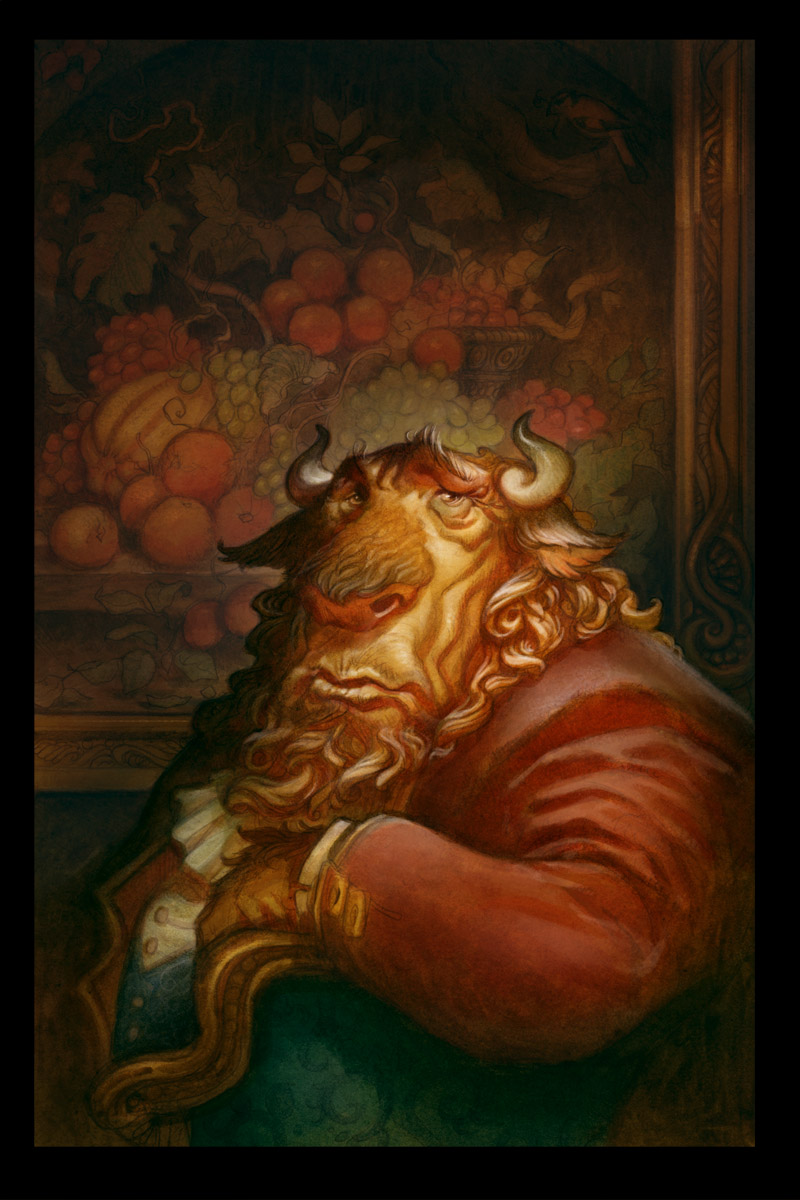
I actually like it much better without the highlights. It looks like a classic portrait that way. The final version loses that charm.
Scott,
I'll do the highlights in a combination. Color Dodge, Screen and Normal. Very rarely I may use Hard Light if a client wants the colors super intense.
Martin,
I tend to leave them. They give the piece some personality. However, there can be such a thing as too much personality and if one is offensively hideous enough and I must correct it, I usually use the clone stamp tool (so it stays looking natural).
I see the digital process as more photo-adjusting than actual painting. So I like to leave the canvas alone as much as possible.
coNs,
I know what you mean. Sometimes I worry that I have overworked a piece, especially if there are too many normal layers in the mix. But I kind of can't help myself. I just really love exploring the lighting in the pieces.
That last comment about zoom is completely true. Damn the slavery to microscopic refinement!
Hehe, I definitely know the feeling. I'm sorry I only focused on what I didn't like btw D: Was kind of in a rush. I love the way you paint. Thanks for taking the time to answer!
I really like the piece after the colour adjustment. I think you've tweaked it just enough to make it pop but not so much that it loses it's freshness. Coming from a COMPLETE amateur of course, so don't mind me. (laugh!)
this is lovely! extremely useful! I think starting with traditional watercolors and working on it digitally is such an interesting thing! I want to try it out… *___* I have some watercolor drawings that can benefit of this, I don't like them after they have been scanned (ok, my scanner is also quite poor)
thank you! <3
Justin,
Brilliant as usual. The digital stage is always so exciting because you can push beyond the limits of the medium.
In your previous post you mentioned going back and redrawing lines. Do you ever scan in your line drawing and layer them over your watercolor to get back your lines? I've been doing this, and trying to line both of them up is sometimes a nightmare.
The other thing that I'm wondering about is size. Do you have a typical size you like to work in? If you work bigger than the bed on your scanner, do you find it easy to photomerge the pieces together…or do you have another technique.
Thanks Justin.