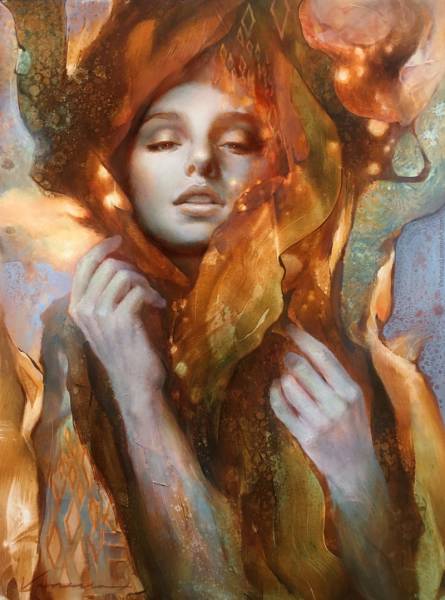
I’ve put together a progression of images and short videos for a painting I recently finished for Every Day Original’s auction in the month of May, with a brief description of a few stages of the painting.
Mark-making and Abstraction
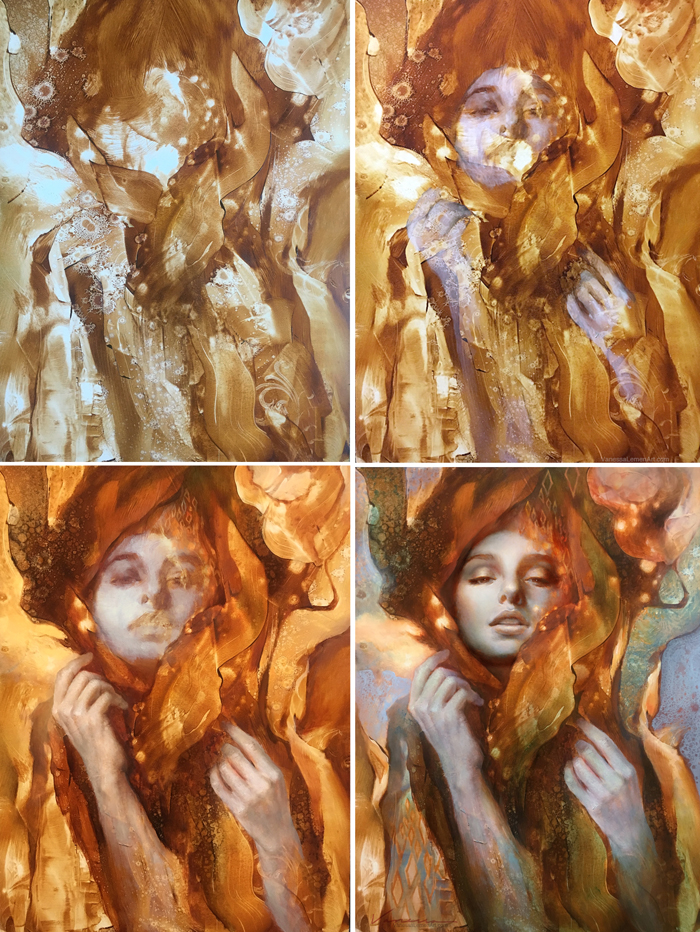
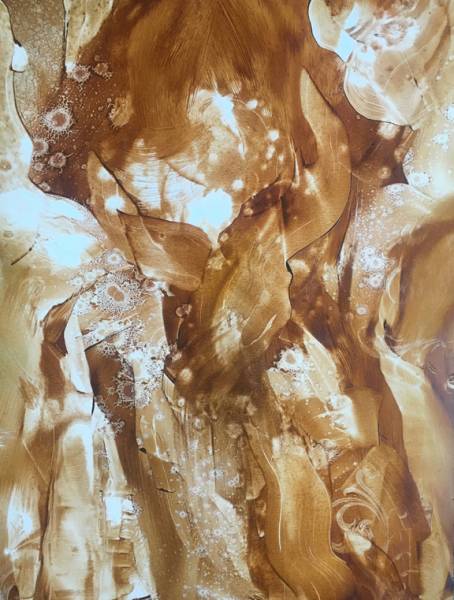
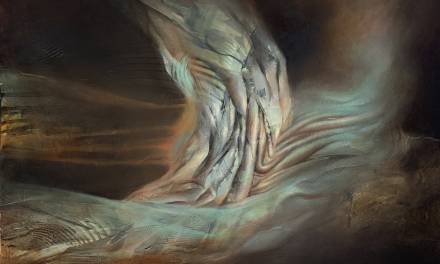
This is the beginning abstract stage, and is how I generally start a painting – by making marks and abstract shapes. I continue to carve out and paint in, wipe away, splatter and drip mineral spirits, and most times I use more than one color, but for this particular piece, I only used Burnt Umber. Also, I turn the painting in different directions while I work. This stage is mainly an experiment-and-discover stage, while it loosens and frees me up as well. I usually do several of these at once. I may continue to paint on one right away, and set the others aside to dry, and paint onto the other dry starts as underpaintings for future paintings. I did about 4 or 5 of these abstract starts for this, and chose this one because I saw something in the marks that I felt I wanted to work with. When I say “I saw something in the marks,” I mean it in the way that it is similar to how we see familiar forms in clouds. The painting eventually develops into realized forms often times within atmospheric environments.
The tools I used for this were:
a chip brush or bristle to initially lay the paint down
one or two soft mops to soften areas
A silicon spatula (a baking spatula)
mineral spirits for splatters, etc
rag or paper towel
rubber stamp
oil paint – (only burnt umber for this one, not for any particular reason)
linseed oil
The surface is a pre-gessoed masonite board (this is a slick, not-very-absorbent surface)
I’ve included the 4-up image below so that you can have a look and see what kinds of things you discover in the marks when you turn the image in different directions.
A quick note: in case you’re wondering why I start this way.. First, this isn’t always how I start, but the general idea of starting with a chaos of sorts and pulling forms from that is a method I’ve found to work well with my temperament. In the past, or in much of my painting from life experience, I tend(ed) to start with a linear construction and built up my forms into that. Since I also have a tendency to a) love experimenting with materials, b) obsess over details, and c) really dig rendering too, I found that this is both good for me (to keep me from rendering too tightly everywhere) and creates a natural flow instead of being overly heavy in one aspect of painting (for example, not being too tightly rendered everywhere, as well as not being too heavy on the chaotic side too). It works for me as a natural sort of painting method while also creating some unexpected challenges frequently. That’s a great combo in my book, but may not be the way everyone likes to work.
Basically, I enjoy many techniques and methods of working, and I’ve found this to bring several of them into my experience.
Pulling Forms Forward from the Abstract
At this stage of the painting, I am finding the image within the abstract, laying in the shapes, and beginning to model the forms. The paint from the first stage is dry on the surface, and in this stage, I’m beginning to paint a layer on top of that dry underpainting.
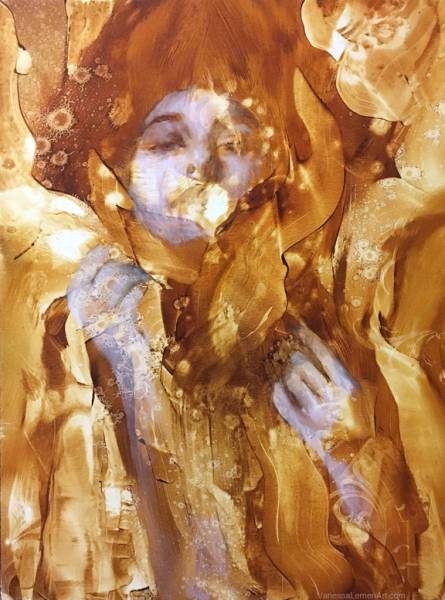
I’m sharing a few photos and a video of how I painted into the abstract marks to bring forms forward from the marks. What I saw was a figure in the abstract marks, sort of swooping into the picture plane – arms, hands, and head with what looks as if it could be the hood of a cloak or an interesting hair shape.. So that’s what I started to block in. The video here only shows the head, but the same method that I used in the video was how I painted the hands as well.
What I saw in the marks initially was a shape of a face in the center of that dark abstract cloak-like shape, with one eye socket as a dark shape, so my first marks to start with were to give it the other eye socket, and then down the bridge of the nose, and so on. So that is what you see in the 2nd image in that progression. In the 3rd image in the progression, I used white to build form in what would be the lights of the face. It’s neat to see the turbid effect in effect here, where the white is laid-in over the top of the dry burnt umber underpainting, giving the appearance of a cooler tone.
The tools I used were:
a few small sables
white and burnt umber
a small bit of linseed oil
More Blocking in and Developing Forms
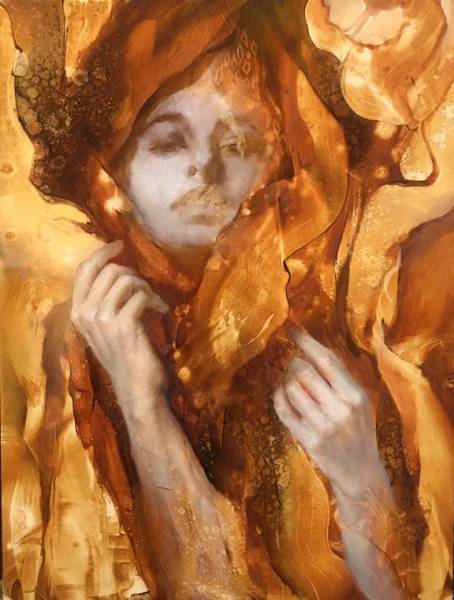
Here is a bit more of the development of the forms as I’m blocking in small areas within the larger hand shape. The 3 progressions show the development of the hands from a quick scumbling in of large shapes ghosted on top of the dry underpainting’s abstract shapes to where the video was taken as I was working into the smaller areas within the hand. I used a few round sables for these areas, mostly dry brushing in thin layers to build up varying degrees of opacity.
At this point, I’ve still mainly been using only Burnt Umber and White with a little bit of Transparent Red Iron Oxide added in some areas, which retains more of its warmth when white is added to it, so keeps the overall underpainting’s warm tones universal on the surface.
The Finish Stages
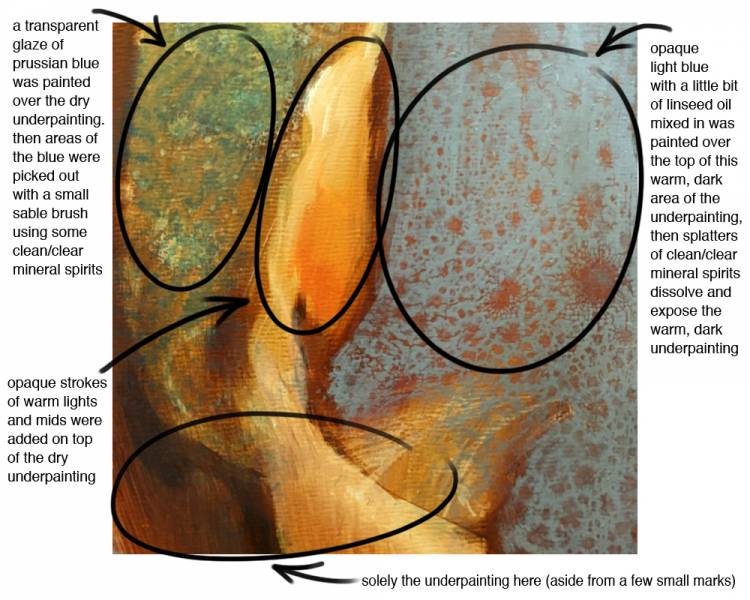
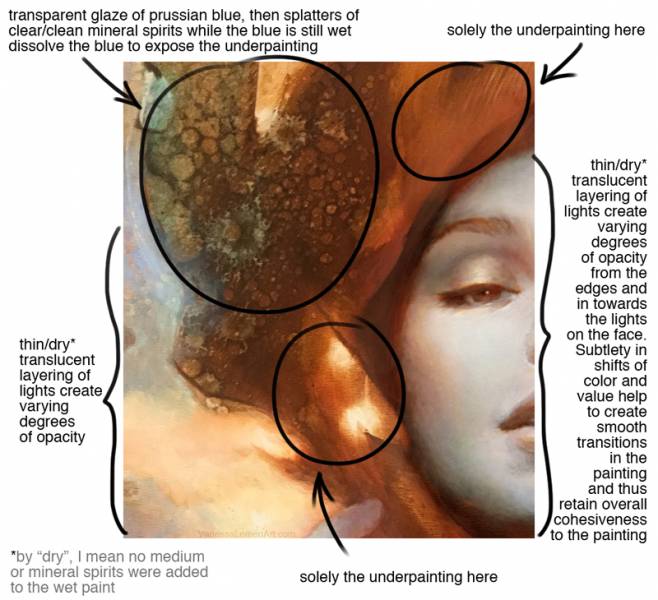
When I add color and more of the finishing brushwork to my paintings, I also want to maintain much of the texture in the underpainting in some areas while in other areas, I look to build up thicker paint in more layers in order to have more opacity and have less of the underpainting show through.
Throughout the entire process, it’s really so much about responding to and maintaining a balance and focus, and especially in the later finishing stage, it’s very much guided by what feels cohesive – I want what I’m adding to the painting to feel like a natural addition to what was already there, and much of how to retain that has a lot to do with not necessarily painting opaquely over what’s underneath, but allowing for what’s already there to either show through (or feel as if it does to some degree) or naturally progresses from what’s underneath to what’s added. Many areas of the painting that show less of the underpainting were built up in thin layers of translucent paint until they become the opacity that feels right for that area and transition in and out of the abstract underpainting by allowing the edges of the opacity to taper off into the underpainting.
Aside from what I’ve noted above, much of what I added to the painting were cool translucent colors, and this helped give the warm underpainting that glow in places.
This method of working for me was developed organically and over time, combining different aspects of painting that I’ve experienced throughout my time painting. I’ve no doubt that tendencies towards a way of working will evolve and morph in the future into something derived from this but with new experiences added. I look forward to it!







Gorgeous. Thanks for showing your process!
I love seeing your process. I have a similar way of working, but seeing how you keep certain aspects raw is so lovely. You are a huge inspiration! Thank you for creating such magical work. I was wondering, do you reference a model in this painting? Or is she from your imagination?
Beautiful, imaginative work that relies so much on how an artist sees the universe: as Paul Klee said, Art is making the invisible visible.” Very informative revelation of process involved in bringing these creations to life in the videos, with the loving hand and focused mind of the artist evident throughout. Rich and wonderful in their execution, these paintings evoke the sensory aspect of what it means to be living, and to be human. Truly creative and original.