
I think I have to speak about skin because I had a lot of questions about this. Here’s a list of tricks to do paint more “realistic” skin with your computer …
Skin Tones
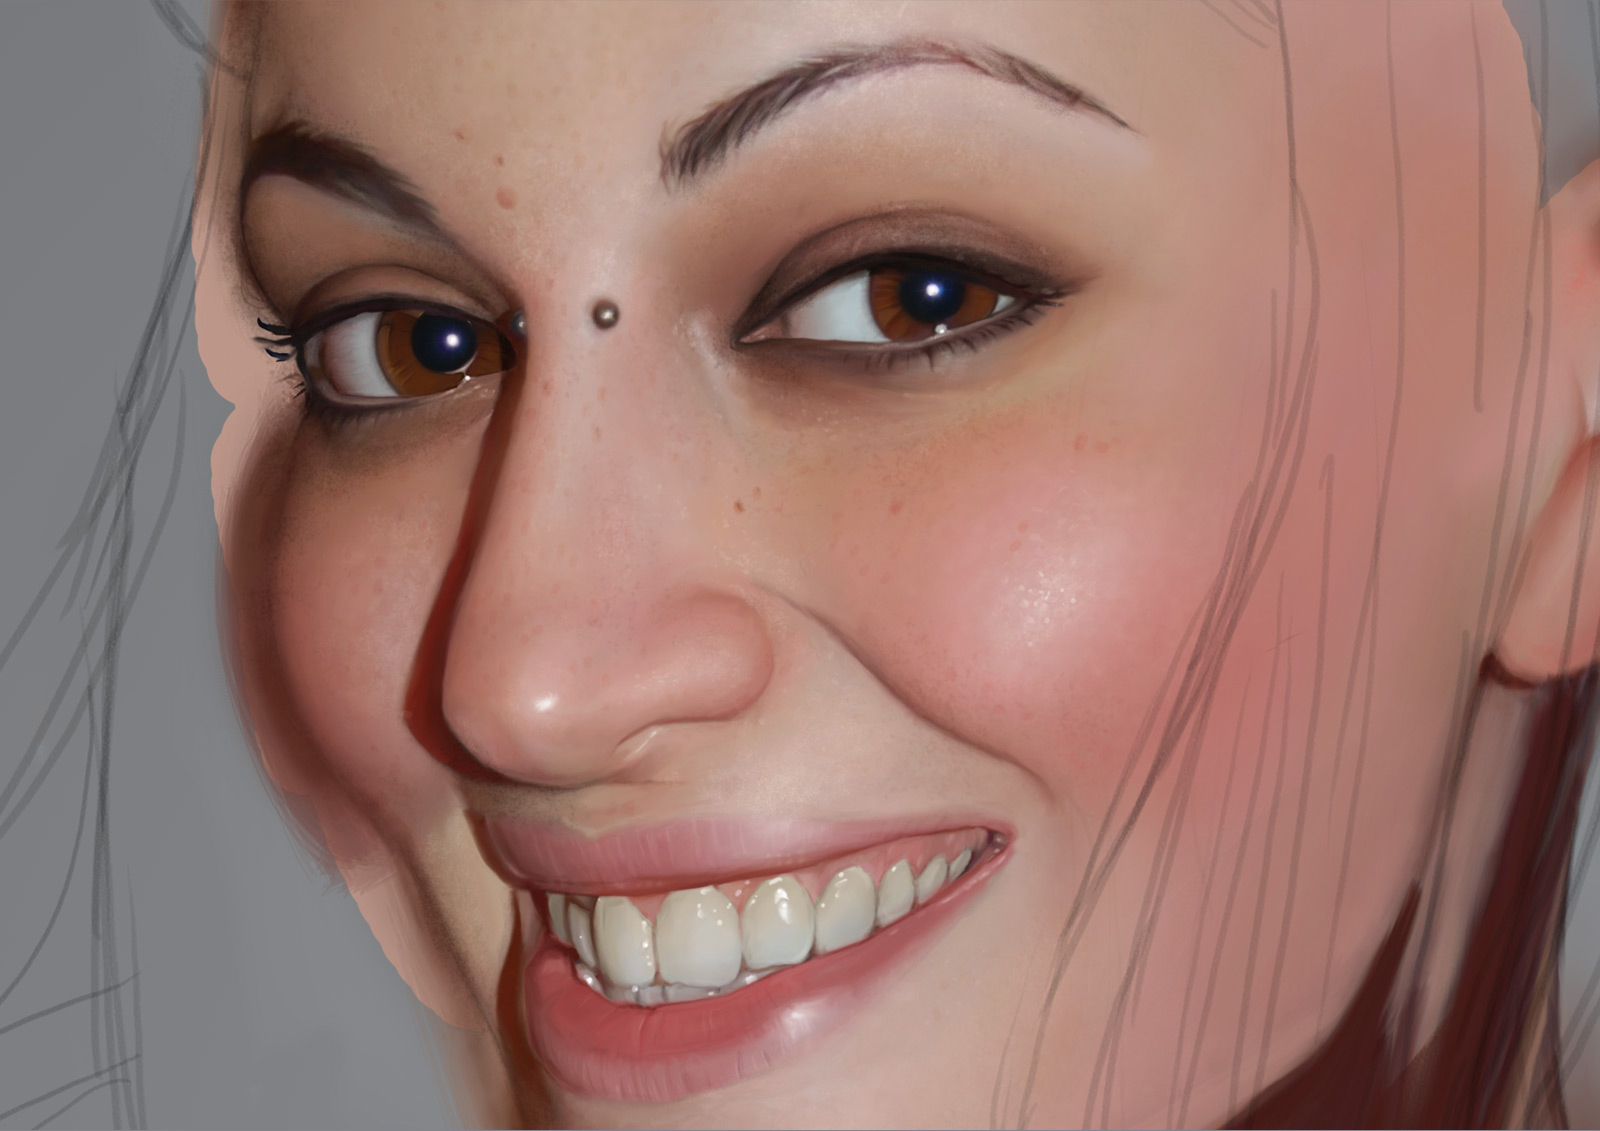
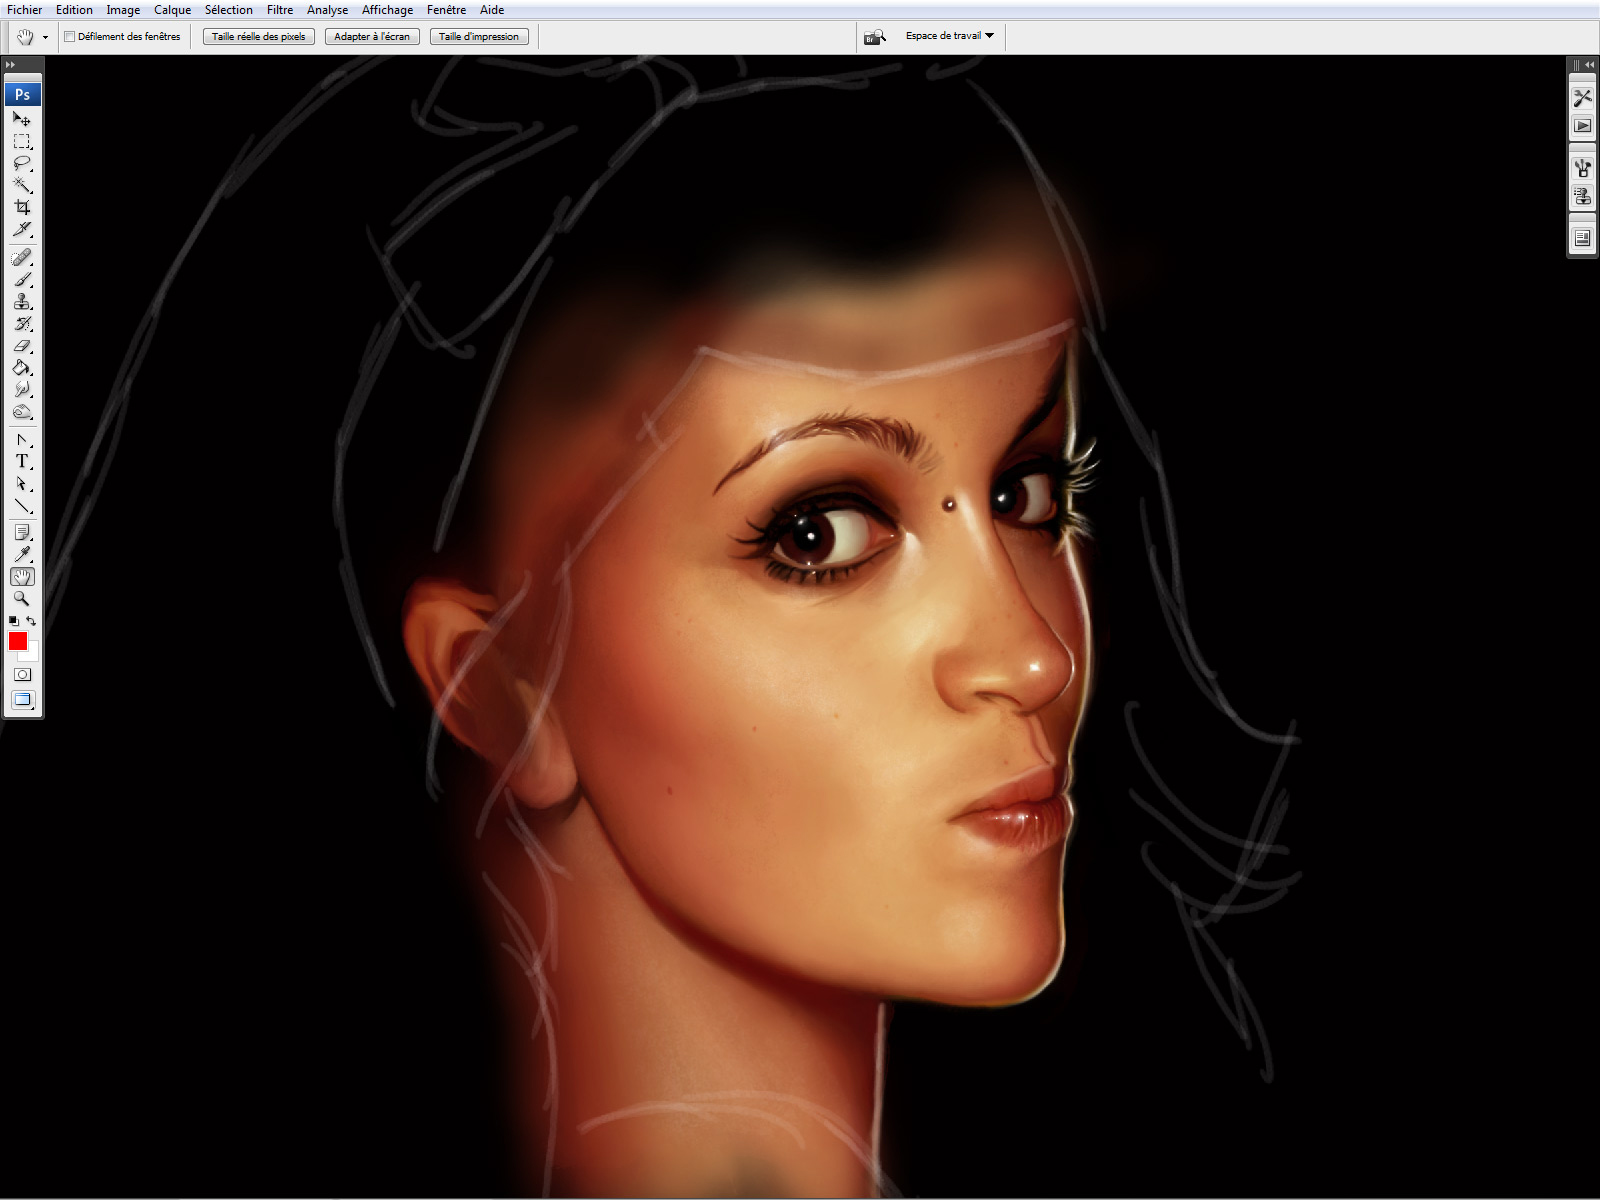
Avoid simple gradients. You cannot obtain convincing skin if you only add black and white to a basic skin tone. It’s more complex than that.
Of course, all skins are different but you can try this :
– A little bit of olive green on the shadow.
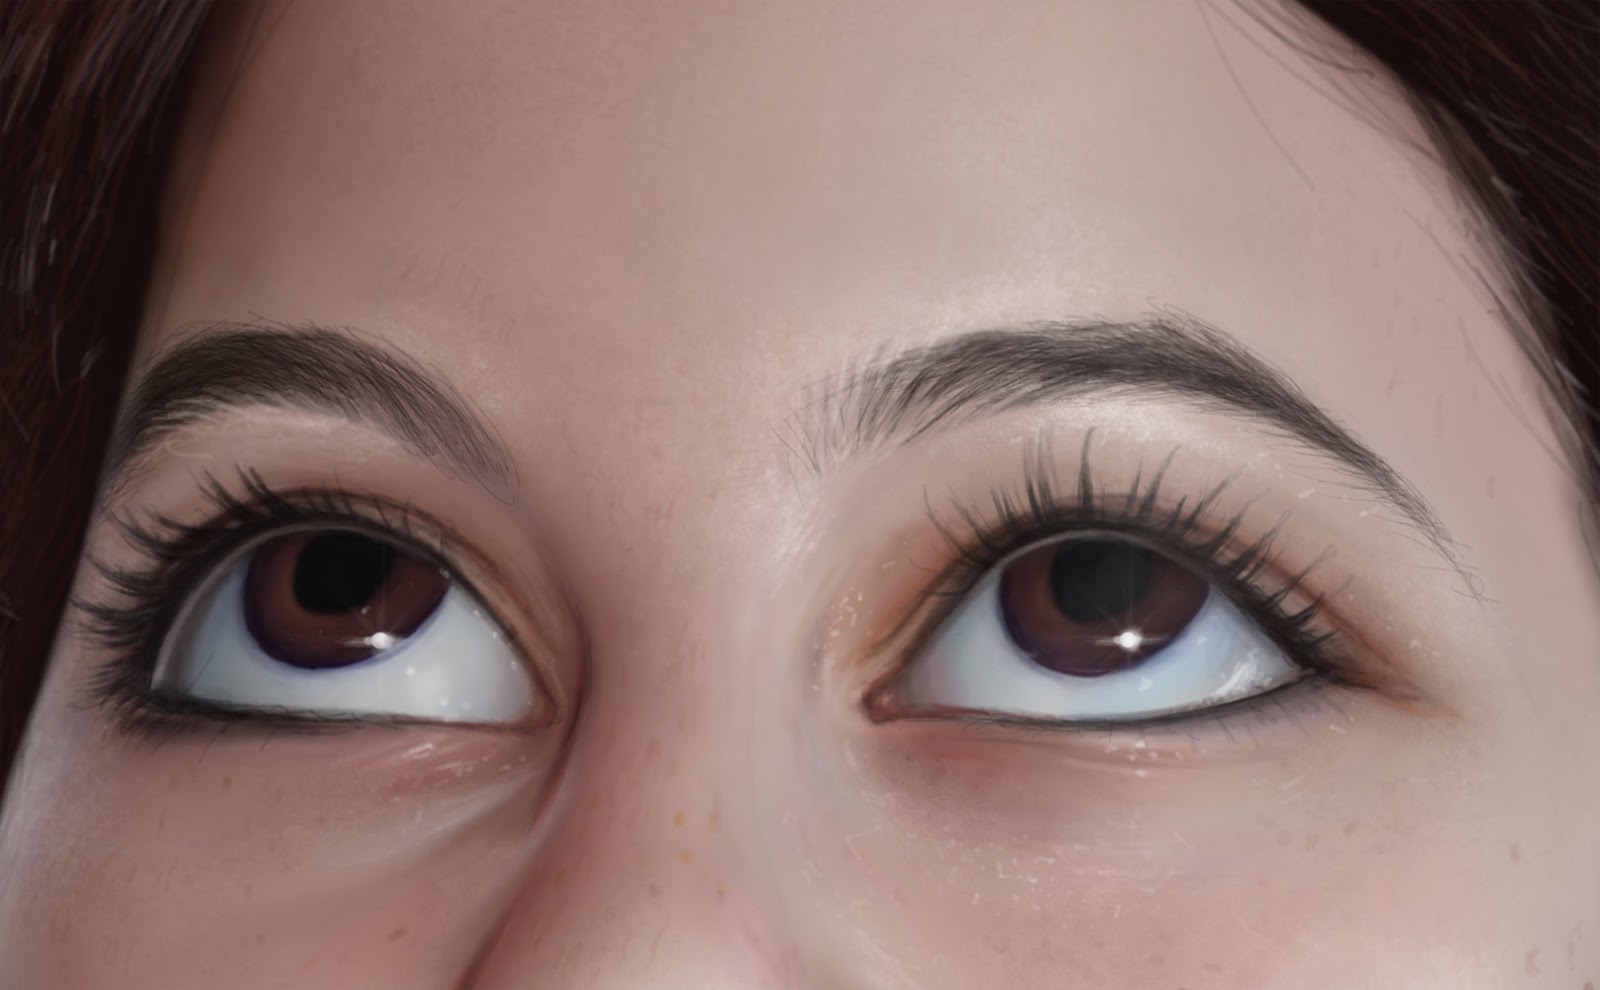
– A little bit of blue under the eyes (lower lids).
– A little bit of red on the cheek bones.
Just work with low opacity (0 – 5%), on a separeted layer and with the soft round brush.
By the way, if the contrast is not good, it will not work. Contrast is more important than color.
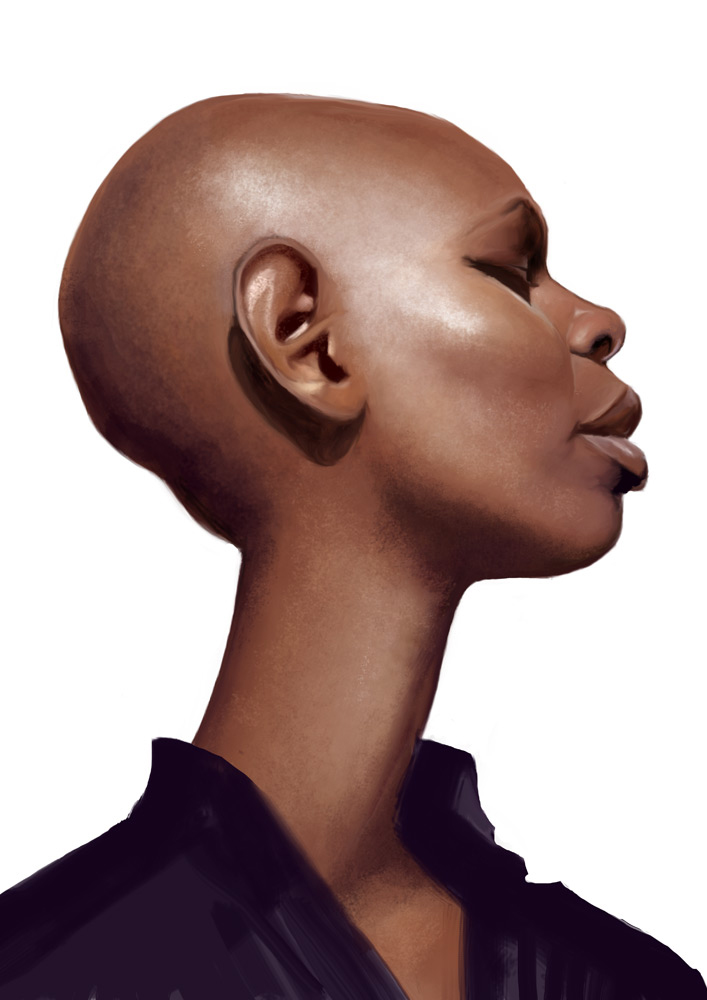
About black skin, I never find a good and single way. It’s really depending on the color of the skin. As black skin is usually very reflective, the light has a big influence on the tones.
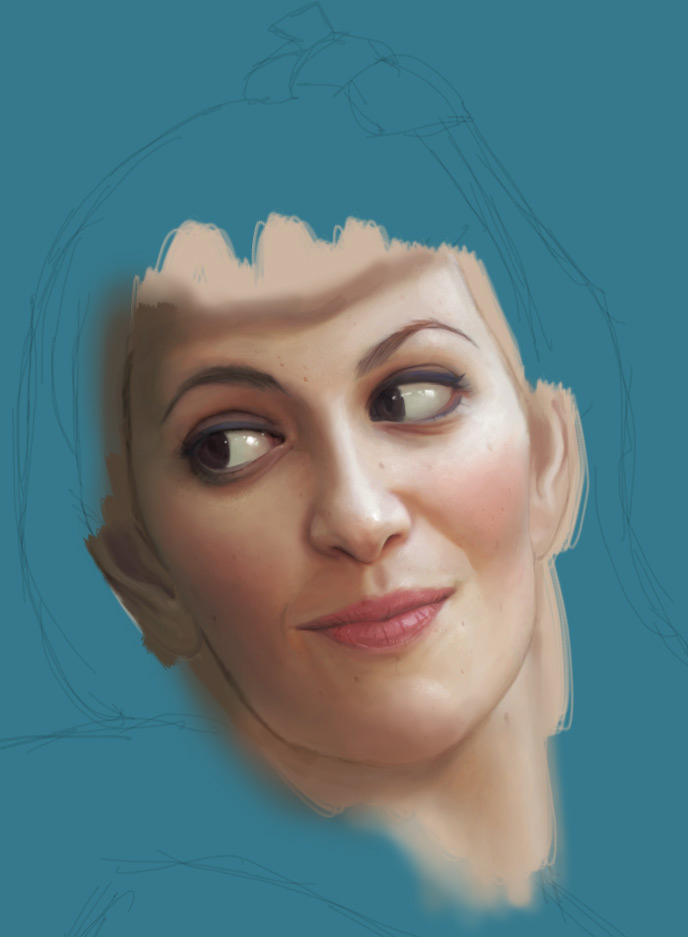
Influence of lights
Don’t forget the ambient and the direct lights could changed your basic skin tones. With a strong light, shadows are very dark and the contrast of your picture has to be high, for example.
The color of the light is important too. Your palette depends on it too.
You can easily adjust the contrast/the tones/the luminosity of some parts of your picture with your favourite software. It’s not the better way to work but it could sometimes be helpful.
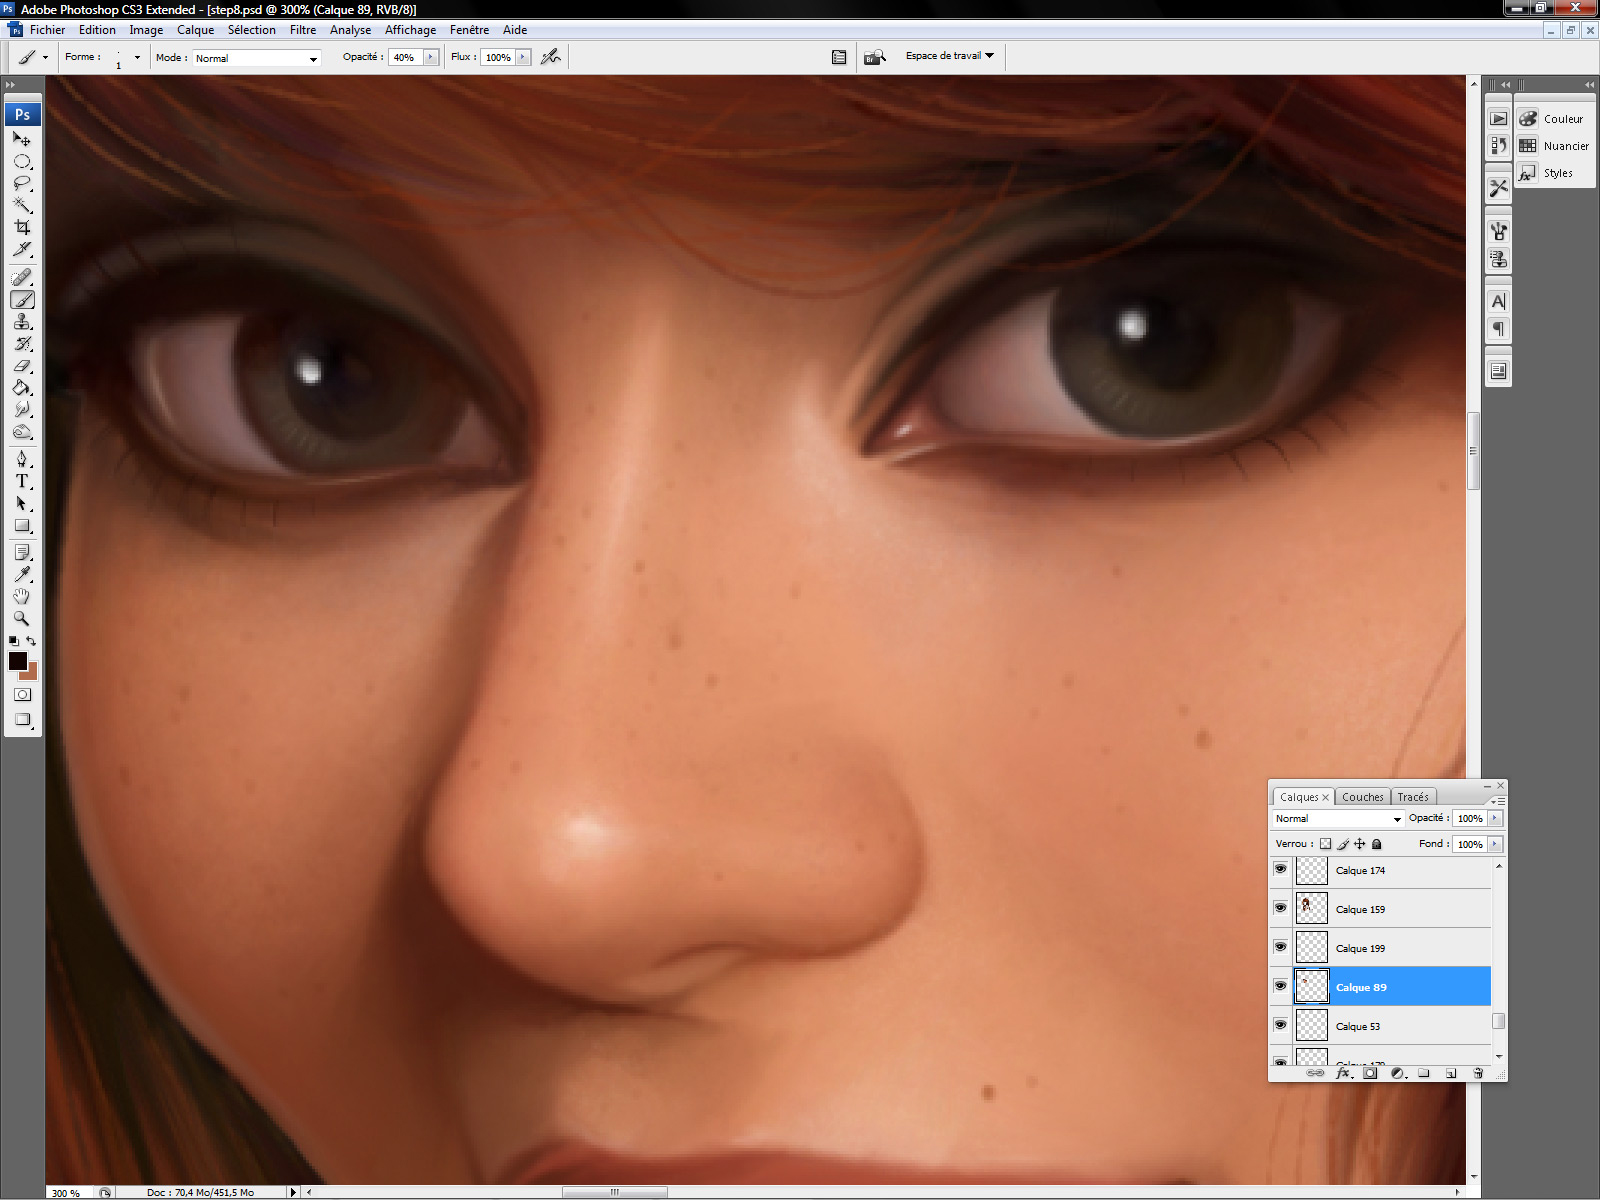
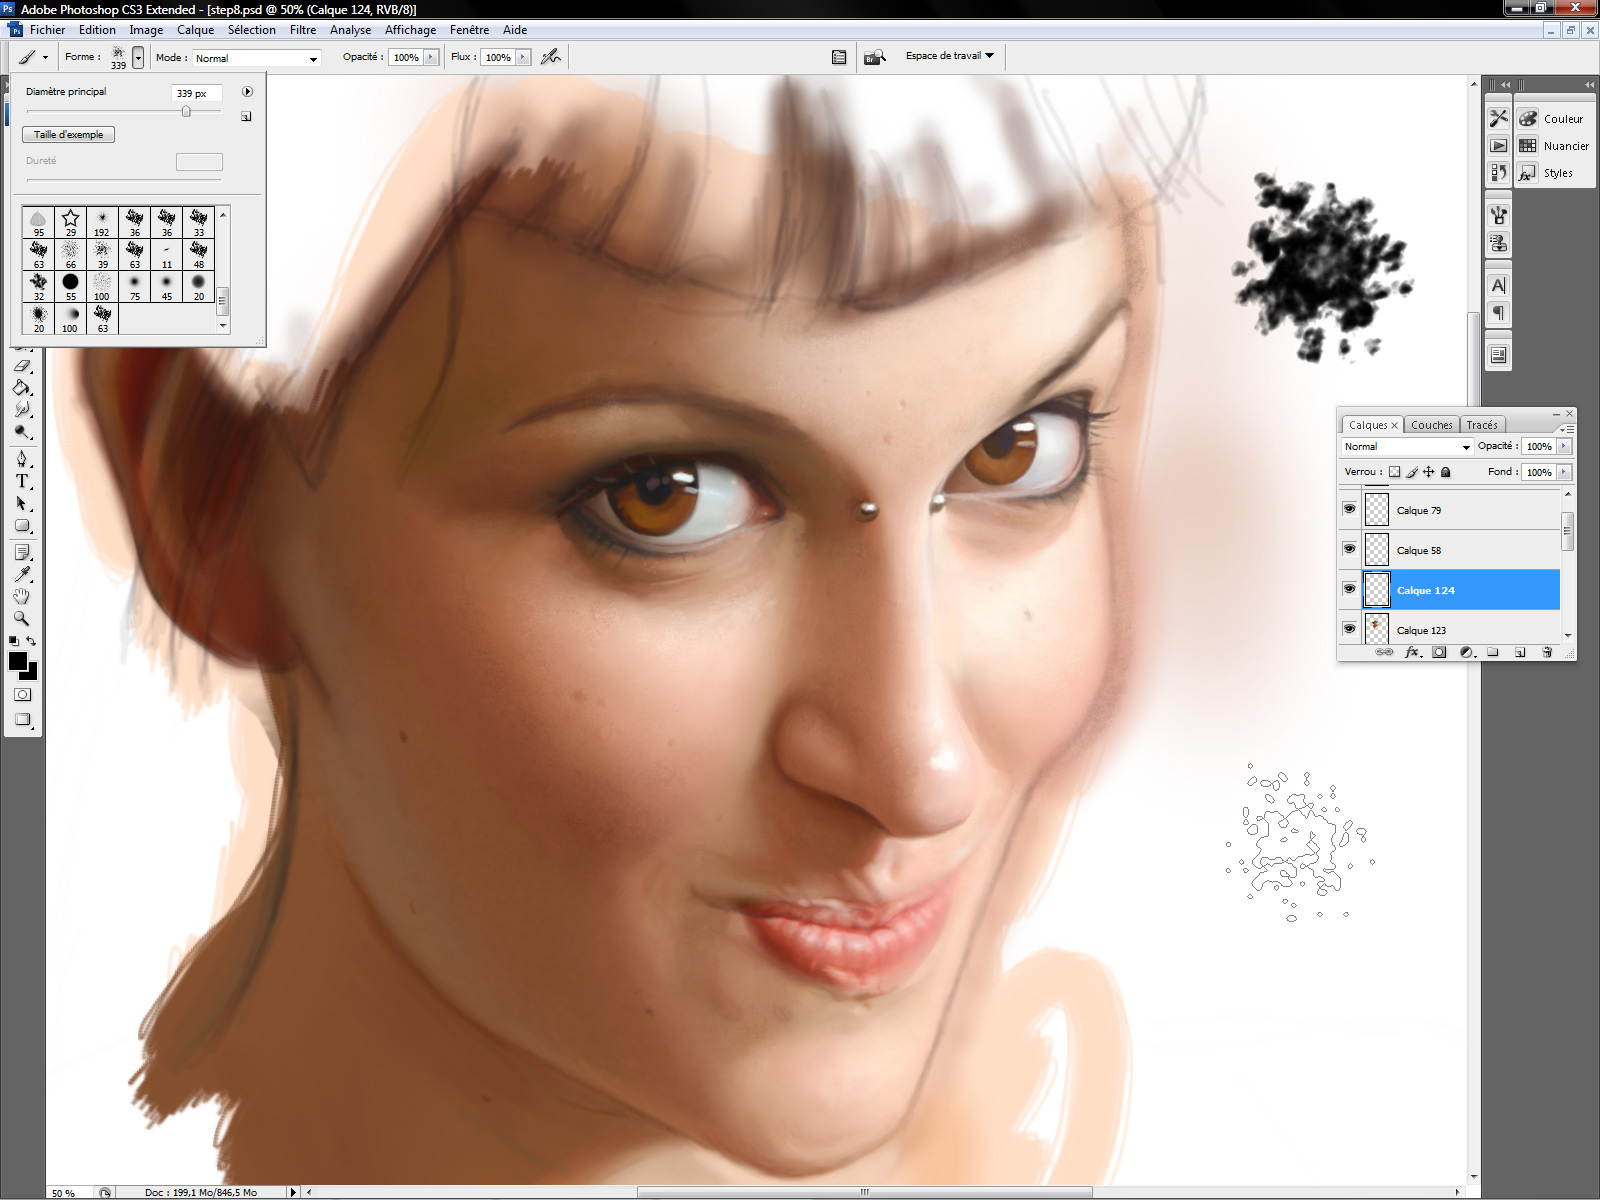
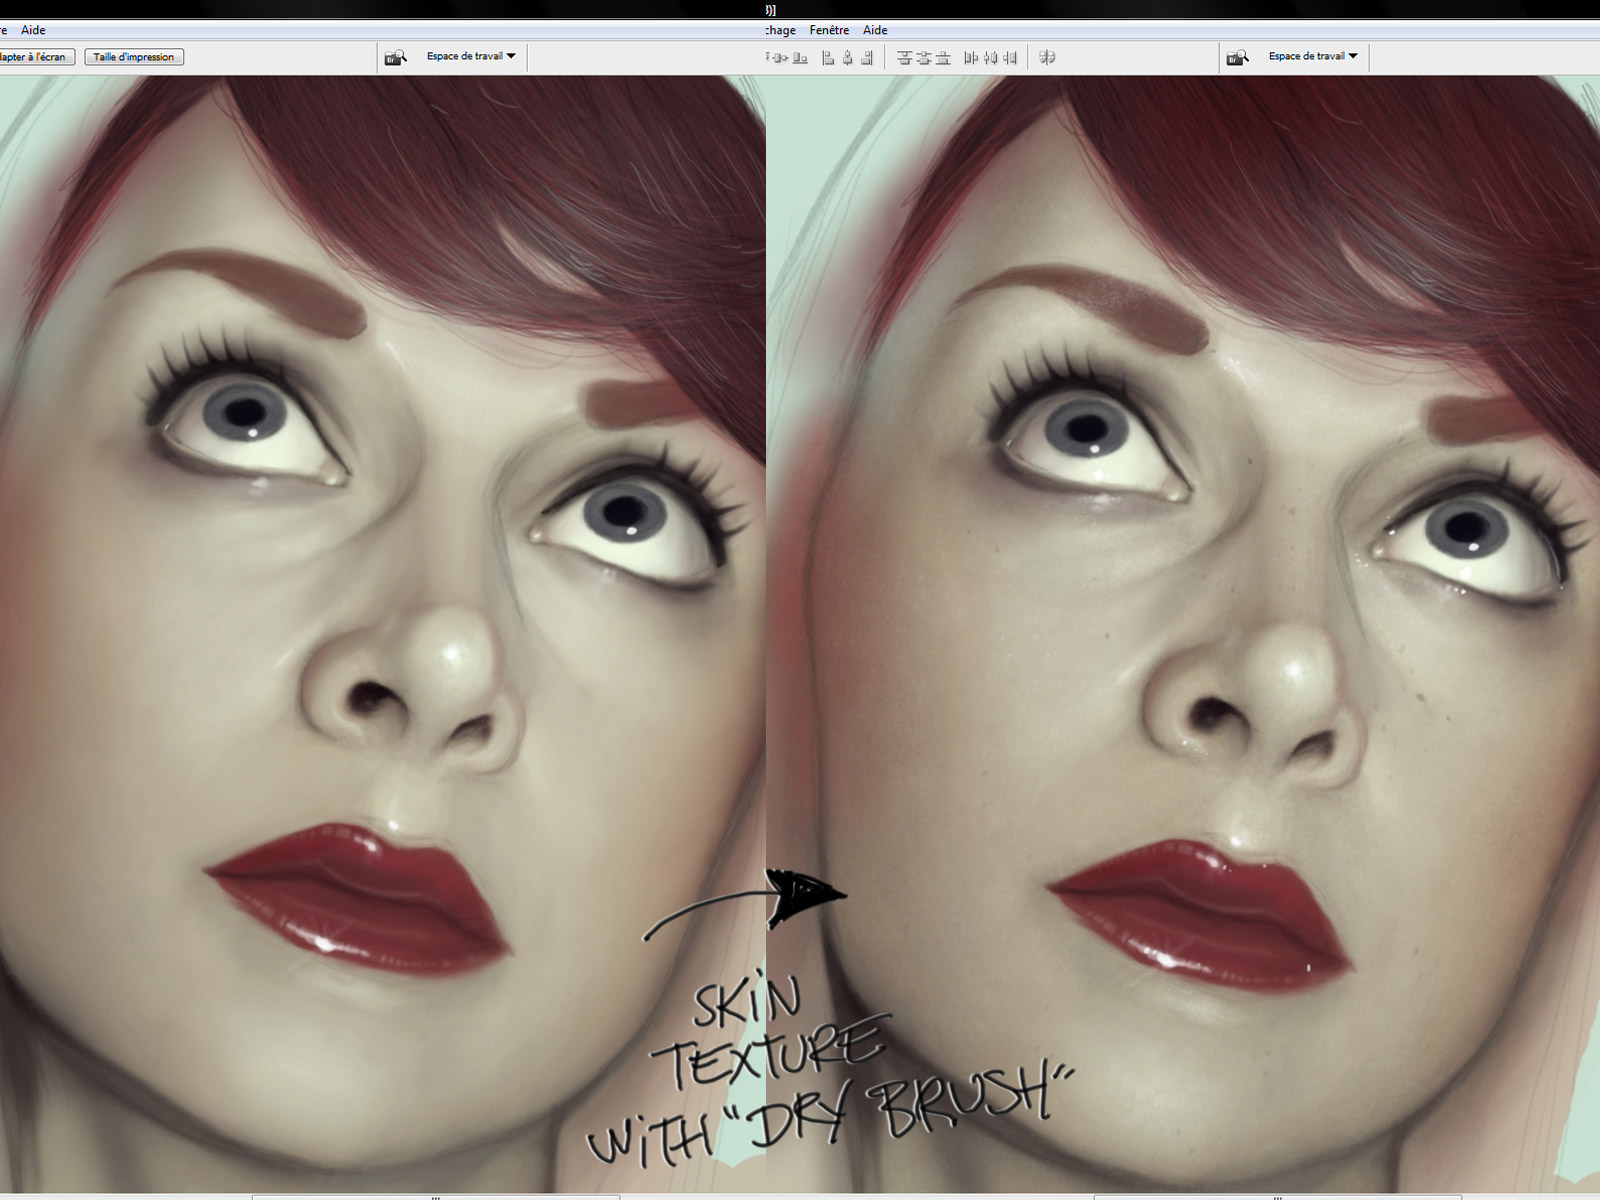
Skin texture
I use the “dry brush” to do skin textures. It works pretty well if you use it carefully. Once again, try to work with very low opacity and on a separeted layer (so you could change the opacity of the layer too).
For the beauty spots and the freckles, I use the soft round brush … A very small one. Working on a high resolution picture is easier … It’s not very long and you don’t have to be very precise.


Can you elaborate more about what “dry brush” is exactly?
It's a PS brush. You can find it easily, it's a standard brush 🙂
Thank you so much for sharing this! :)You are an amazing artist!
Awesome explanations, man! As the other Anon said: Thank you so much for sharing this!
works like a charm, thanks for the useful advise!
Very nice to see how you do it 🙂 Awesome post!
Excellent as always Serge!
thanks for sharing 🙂
I know you probably spent many years achieving the talent you have now – but I think I may still hate you nevertheless : P
Thanks so much for this. You've an incredible talent; and any pearls of wisdom coming from you are very much appreciated! Thanks a ton!
Thank for share, man…this was great
You very good advice man. Thanks and HOORAY.
I gather you do, but to make sure, Do you use a “custom” texture with that standard brush for skin textues?
thanks for sharing, waiting thirsty for more, can we see how you do it?
Serge,
For your dry brushing of the skin texture, what method do you use to select the color to dry brush over the base paint layer? For instance, do you eye drop the area you will be painting over and then select a shade slightly lighter or slightly darker or do you have another method?
Scott Talevich
I usually start with white (or very bright tones) on the most reflective parts. And, yes, I pick up the colors of the brush on the face 🙂
Brilliant! So much useful info explained so well. Thanks Serge.
can you do a tutorial on hair next??hehe..
Awesomee ..tysm for this n can u giv sum tips on drwing nose
Well, I know only one way … use a very, very small brush :DDD
Here's an example :
http://sergebirault.blogspot.fr/2011/01/chloe-photorealistic-attempt-hair.html
oohh..thanks.10 hour hair..i see how much you put work into detail..very nice sir.hehe.also for your dry brushing stage is there a specific type of dry brush you use??very much appreciated sir.
I use a Ditlev brush (You can find the pack easily) but you can use a hard or a soft round brush, it doesn't make a lot of difference 🙂
i do use the soft/hard round brushes. haha! and well i cant seem to get the same texture this is very challenging. man your works are insane!pass me some of those skills.=)
I'm sorry but it isn't helpful at all.. I mean.. how does this help me executing it?
Also if you are painting directly from reference it is way easier than picking the colors by yourself..
I don't work very often with “direct” references. Btw, picking the color is not the good way with my technique (because I work with low opacity brush). It's more about tip do do skin texture here, sorry if it's not helpful for you … Try this :
http://sergebirault.blogspot.fr/2011/01/chloe-photorealistic-attempt-face.html
http://sergebirault.blogspot.fr/2011/01/chloe-photorealistic-attempt-breast-and.html
http://sergebirault.blogspot.fr/2011/01/chloe-photorealistic-attempt-hair.html
http://sergebirault.blogspot.fr/2011/01/chloe-photorealistic-attempt-hands.html
No … I even don't know how to customize a brush ^o^
The problem seems to be that the end result still seems waxy and plastic. Perhaps you might want to try experimenting with a more painterly approach, in which you start from very dark and move to lighter tones by building up layers of colour, shade, etc.. If enough of the darker shades show through it might give things more solidity. A wider colour palette would also help.
The goal is to have a plastic look because I use to paint very shiny stuff (plastic/metal/latex/rubber/ …). I'm a disciple of Sorayama, you know 😉
Btw, I like your work Jerry, your techniqye is very impressive !
Thanks!
My point about waxy/plastic was referring more to the way you've done skin. Have you used oils or anything similar when not doing digital work? I ask as with oils (for example) you can build up layers of darker hues and overlay those with lighter ones. This is doable digitally. So if you were working on the blue of the lower eyelid, the blue would go on first and then you'd add thin layers of lighter skin hues over that. If instead you put blue over the top of the skin hues, that's like applying make-up and causes a different effect 😉
Well, I used to apint with traditional airbrush and acrylic … 20 years ago ^^'
The post is giving information about digital switch. Know all about it
Thank you so much for sharing this awesome!
Opacity of 0 – 5%? I never thought of that. Thank you for the tip!!!
great tricks – and ALWAYS use them!!!
I'll get more from sights like this then all the fucking books I spent money on,thanks.
Very glad to see you here, i’m a huge fan of your work !
I have never tried painting Digitally and recently I have been really interested to do so. I have learned some useful information and I have gotten more inspiration to try doing a digital painting.
Thanks to share this best information with us.
Your work is so amazing! Thank’s for sharing the knowledge!
What painting site do you guys use?
Very nice .
Thanks for sharing this article, It was quite insightful.
Hoping to see more articles with useful information.
Well described.
Top Health Center offers comprehensive healthcare services to ensure your well-being. With a focus on personalized care, our expert team provides high-quality treatments and support. Whether you’re in need of routine check-ups or specialized care, our Primary Care Doctor Minneapolis is dedicated to keeping you healthy. Choose Top Health Center for trusted, compassionate healthcare tailored to your needs.
Diprima offers stylish and durable accessories designed for everyday elegance. Among our top products, hair elastics stand out for their superior hold and comfort, making them perfect for all hair types. With Diprima, you get quality, reliability, and chic design in every piece. Discover the perfect blend of fashion and function with our premium accessories.
Cricketids offers exciting opportunities for new users with 500 RS Signup Bonus Betting Sites. Instantly boost your betting journey with a free bonus and start playing your favorite games. Cricketids ensures a secure, thrilling experience for beginners and seasoned players alike.
Estate Lindholm offers a unique blend of comfort and Caribbean charm, perfect for travelers seeking unforgettable stays in the Virgin Islands. Nestled on a scenic hillside, this boutique inn provides stunning ocean views and personalized service. For those searching for top-rated Virgin Islands hotels, Estate Lindholm stands out as a peaceful retreat with authentic island hospitality.
Explore premium Vacant Land for Sale in Florida ideal for building your dream home or making a smart investment. With flexible pricing and top locations, Maddassets helps you secure land that matches your vision.