A while back, we discussed how Dan dos Santos photographs his artwork. However, just like painting, everyone has their own way of doing things. In this article, artist Dave Palumbo discusses his method for photographing artwork, and even shows you how to build a professional set-up for less than $300… camera and all!
A quick note: Some people debate the choice of manufacturers and if the brand matters. Basically, it doesn’t. The examples in this article are shot using Canon cameras and lenses, though I believe that the results would be near identical using any major brand of camera gear. The big picture truth is that the differences between brands are minute in terms of the end results and each company is constantly striving to be competitive with the latest offerings. Any camera should be able to provide satisfactory results if used properly. I’m a Canon user because that is the system which I chose to invest in and I am very happy having made that choice, though I fully support comparing options and getting whatever suits both your needs and your budget.
Additional note: This article was originally written in 2013. The text has been updated (Jan 2020) in places to reflect new developments in technology and improvements to my process.
There are plenty of tutorials on photographing artwork available and I encourage you to read through those as well, because I don’t believe any one method to be the one true way. That said, I’ve read a number of those other tutorials and felt that it might be helpful to some people to share my own method which I’ve developed over the years. I’ve gone through many different processes, set-ups, and cameras and shot hundreds of paintings over that time and have come to adopt a work-flow which is fast, simple, and potentially very budget conscious. The goal here is to demonstrate how to achieve clear, accurate photos of your artwork for the purpose of reproduction in a streamlined fashion. This may look like an impenetrable wall of information, but it is really very simple and fast to implement once you get a handle on it. Using this method, I generally get great results on the first shot with a total time of less than a minute to set up and shoot, and then another minute of digital processing. I also want to demonstrate that, though I recommend using the best equipment available to you, professional print quality results are completely possible on a shoestring budget.
Tools Required:
To begin, there are a few basic tools which are absolutely essential.
A Camera:
Choosing a camera is itself quite a broad topic because there are so many options to get confused by. If you are working on a tight budget, you’ll likely be looking at point and shoot or pocket sized cameras or used DSLRs from a few generations back. If you want something more advanced, you’ll be looking at new mirrorless and DSLR systems.
Compacts:
When shopping for a compact camera to photograph paintings with, there are a few key features to look for. The first and most important is to find a model which will allow you as much manual control as possible. Many point and shoots only have auto and semi-auto shooting modes and this can be limiting for shooting artwork. A camera which lacks manual controls also almost certainly does not allow you to record files in RAW format, another concern for getting high quality reproductions (particularly if you need to print your images large). The third concern is to find a camera which has at least a 10-12 megapixel sensor. Megapixels are counted by multiplying the number of pixels across an image by how many pixels tall it is and then dividing by one million. A ten megapixel image is literally made up of roughly ten million pixels. The more pixels, the higher the resolution (and therefore print size) of the images it records. If your camera records in RAW, there is no compression on the image which means more latitude if you must upscale final resolution, though it is always best to start with the most pixels possible. Because megapixels are really just a measure of area using pixels (like measuring space using square feet), the benefits become less dramatic as the number increases. 10 mega pixels is maybe just enough to get a print quality image with at magazine size, though obviously more is better.
My point and shoot samples in this article is a Canon Powershot S90 (circa 2009).
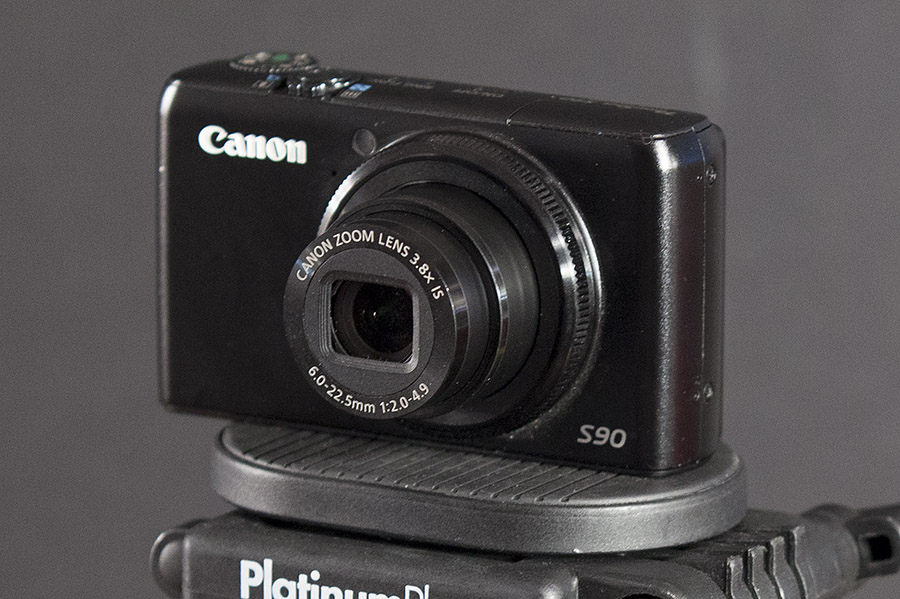 |
| Canon Powershot s90, old and cheap |
DSLR and Mirrorless:
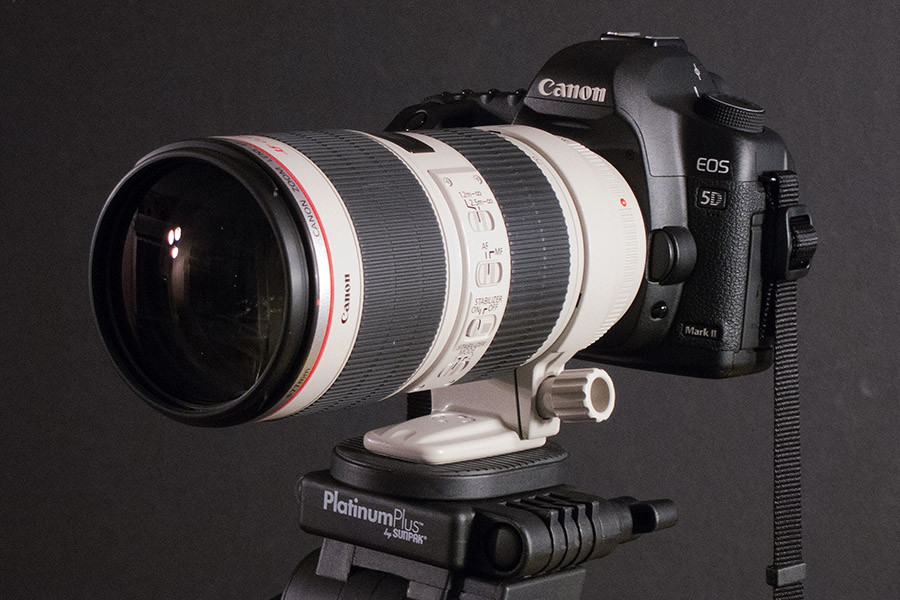
DSLR, or Digital Single Lens Reflex, and Mirrorless are the option for those looking for higher quality and control. These are also called system cameras and feature changeable lenses. One of the most obvious differences between pocket cameras and system cameras is that, due to the larger sensor size, system cameras potentially delivers significantly higher resolution. I recommend going the DSLR route. Even the most basic entry model DSLR should cover all of the features mentioned above, though you should always double check to be sure (particularly if buying older model used equipment). While the differences between entry level and professional level DSLRs can be quite pronounced, any of them used properly will do just fine for reproducing art. While I do advise investing in a good lens, artwork will be shot at middle apertures which usually is a place where even budget lenses produce excellent results. Expensive lenses put most of that extra money into faster apertures and better performance at those apertures. None of which matters for our purposes here. For general photography you’ll likely want something in the standard zoom range (24-70), though I like shooting telephoto for paintings. My go-to lens for shooting art at the time I wrote this piece was a high end 70-200 and I typically shot in the middle of that where distortion is lowest and image quality is sharpest. More on this in a bit.
Tripod:
For my method of shooting artwork, a tripod is essential. It doesn’t have to be anything fancy, but I recommend something reasonably stable. Budget options are typically just fine. Of course there are cheaper choices as well as much much more expensive ones, but the important thing is something which isn‘t going to wobble.
Lights:
This is always the sticky issue for artwork. I used to work with expensive and bulky photo strobes, but they are really a pain to deal with if you don’t have a dedicated photo studio. Some people also recommend the outdoor method shooting in shade or on an overcast day, though I find that to be even more inconvenient (especially considering how often I’m shooting a painting late at night to make a deadline). In the end, I’ve found I get fantastic results using a couple cheap tree style floor lamps from target (each fitted with three 100w bulbs). As a bonus, they also do a nice job keeping my studio well lit. An alternative to those could be $12 clamp lights from the hardware store fitted with as bright of natural spectrum bulbs as the will safely accept. I highly recommend natural spectrum bulbs over regular incandescents. My set-up is 2 daylight bulbs and one standard bulb on each three bulb tree.
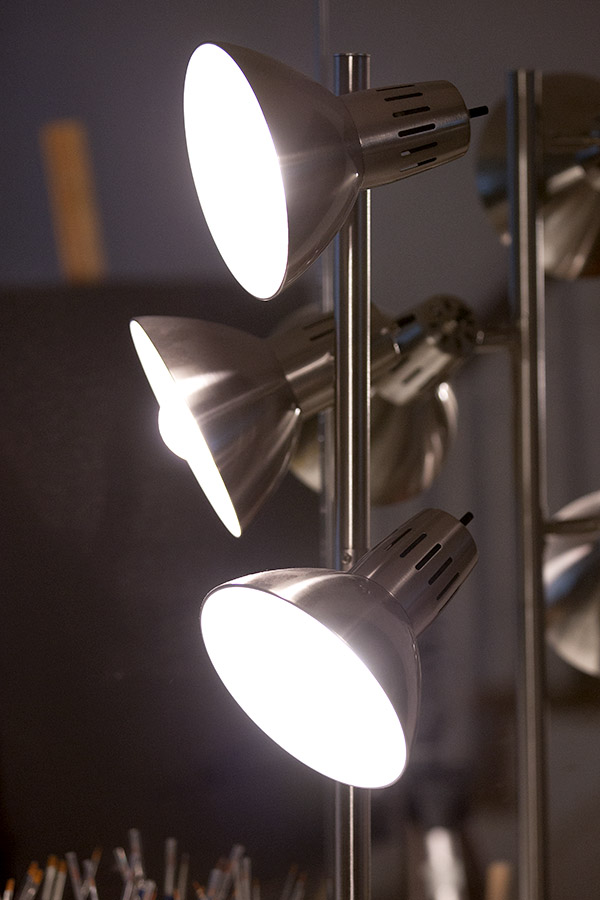 |
| $20 from your local Target |
Software:
You will also need photo editing software and a RAW conversion program. I use Adobe Photoshop and use their built in RAW converter.
Why Shoot RAW?
For those unfamiliar with RAW, this is any file type (DNG, CR2, etc) which saves all data pertaining to an image without any compression added. If you are not shooting in RAW, your camera is disposing of data and compressing the image into a jpeg file when it writes the file to the camera card. This can limit your options in later editing. Among other things, RAW gives you extremely accurate color as well as the ability to correct a poor exposure. Uncompressed images also upscale much better if necessary.
The Three Elements of Exposure:
Before getting into camera settings and lighting set-up, I want to give a brief explanation of the three key components which will affect your exposure. These are ISO, Aperture, and Shutter Speed. For this tutorial, two of these are very important and one is not important at all, but all three should be understood.
ISO:
In the days of film, ISO was the “speed” of the film that you put in your camera. The higher the ISO number was, the more sensitive to light and the coarser the film grain. An ISO of 100 was recommended for bright sunny days and an ISO of 400 or 800 was better for dimmer indoor shooting. As the number increased, the image quality decreased. The same is true in digital photography. The camera has a native ISO and any increase is like turning up the volume, which boosts the signal but also boosts the noise. The ideal is to use the native ISO, which is the cleanest. This is generally 100.
Aperture:
The aperture, or f-Stop, is the adjustable opening inside the lens which regulates how much light passes through to the shutter. As you change the f-stop, the opening gets larger or smaller. Some lenses are capable of allowing in significantly more light than others, thus allowing for faster exposures. This is what people are referring to when they talk about a lens being “fast” or “slow.” The lower the f-stop number, the more light is being allowed to pass through. Typically, shooting with the aperture fully open will give a softer image and darker, even softer corners, so it is not the ideal setting for reproducing artwork. Likewise, shooting with a very tiny aperture will cause diffraction which will also result in a soft image (similar to the effect of squinting your eyes). Though it varies from lens to lens, all have an ideal setting for optimal sharpness which tends to be in the middle of the range. You’re usually safe between f8 and f11, but a few comparison shots will tell you for sure. Compact cameras tend to have much more variety to the aperture ranges which they allow so it is hard to give a standard go-to, but your safest bet is to avoid the extremes. Zooming may also limit the range available. It never hurts to shoot controlled tests at each f-stop to determine the optimal sharpness for any piece of equipment.
Shutter Speed:
The amount of time which the shutter is open when taking a photo is, you guessed it, shutter speed. Typically shutter speed is tremendously important if you are either shooting hand-held and/or shooting pictures of moving subjects. Since we are doing neither of these things, shutter speed is not a major concern using this method. In fact, we will use that to our advantage by sacrificing fast shutter speeds to allow for ideal ISO and Aperture settings.
If shooting at slow speeds, I recommend using the self timer function so that you don’t shake the camera when you press the button. Also, for DSLR users, placing the camera in live-view mode (where the rear screen is being used as viewfinder) will also help because the mirror is locked out of the way and will not cause any vibrations.
Your camera settings:
Mode: Aperture Priority
ISO: 100
Aperture: f8 (DSLR) or middle of the range (point and shoot)
Shutter Speed: the camera will decide when shooting in aperture priority
File Type: RAW
Self-timer: on
Lighting and Artwork Position:
You should have your lighting set up so that it falls evenly across the surface of your artwork with an equal amount of light coming from both sides. If your room has an overhead light source, you probably want to turn it off. Position your artwork on its easel so that it is somewhat low to the floor and as close to vertical as you feel safe with and position the lamps to either side so that the light rakes across at about a 20 degree angle. You don’t want to have the angle too shallow as this will accentuate any surface texture and inconsistencies, though if you have it too deep it will bounce light into the camera and cause glare. When at an appropriately shallow angle, the light will bounce across usually without causing glare. You want, if possible, to have the artwork facing a dark wall. Anything bright in the room, such as white walls, floor, ceiling, or your t-shirt, may reflect in the surface of your artwork, especially if the image is dark and/or shiny. If need be, you might even buy a black sheet to hold up behind the camera to reduce room reflections (I do this often on problematic paintings.) To aid in color-correction, you may also want to place a white sheet of paper (or more sophisticated color correction materials) above or next to your artwork so that it is receiving the same amount of light. Additionally, I like to shoot paintings while still wet or with a coat of retouch varnish to bring out the richness of the color and contrast, though this may make the image more reflective and problematic if it is large and/or dark.
For those working on textured surfaces like canvas, specular highlights may still occur. If so, there are articles and videos out there on using polarizing filters to control this. I don’t run into this problem, but recommend looking them up if you do.
Camera Position:
Mount your camera to your tripod and set it a comfortable distance from your artwork. There is a balance to reach here and it will be different with different cameras, lenses, and surfaces. The further back you are, the less textural glare will reach you. On the other hand, the image should almost fill the frame without resorting to any digital zooming (optical zooming is fine). Point and shoot cameras often have digital zoom features in addition to the optical zoom, but they will degrade the image quality. If you can’t tell whether your zoom is optical or digital, the zoom always starts in optical and will finish the last leg digitally. You may feel the motor stop when it switches and it will likely indicate on the status screen that it is magnifying beyond the optical zoom range. You will likely also notice the image become grainier. Some cameras will allow you to disable the digital zoom which I would recommend doing.
If using a camera or lens with some type of anti-shake or image stabilizing feature, be sure to turn this feature off. When mounted on a stable tripod, the anti-shake may create feedback which will result in a soft image. Some cameras and lenses are designed to correct this automatically, but many do not.
Using the view screen (and the grid overlay if available), set your tripod height and angle to be as square as possible with your artwork. You want for your camera to be parallel and centered with the surface of your artwork. Another reason that I like shooting with a telephoto is that it tends to give far less distortion than wider lenses, though this can be easily corrected later in processing. Squaring up the image with the camera is possibly the trickiest part of this whole process.
I then place a greycard above my painting which will make white balancing very quick and easy. These are cheap and you should be using one. Once you have the artwork correctly in your frame, focus and shoot. I prefer to manually focus, but usually the auto focus is dead on. When you shoot, set the self timer so that there is a delay between pressing the shutter and capturing the photo. This will prevent your pressing the shutter from adding any shake to the camera. As mentioned above in the camera settings, we are shooting in Av mode, which means that the camera will automatically assign the shutter speed based on your aperture and how much light the camera is reading. This might result in some very long exposures during which, obviously, you don’t want to touch or disturb anything. If the image looks too bright or dark, you can fine-tune it in the RAW conversion or (preferably) you can set the exposure level on the camera. Your histogram will show if you are losing any information in the highlights or shadows (if the graph extends beyond either edge) and that you need to reshoot the image with an adjusted exposure. I typically shoot paintings at a -1/3 exposure adjustment.
Processing:
If shooting RAW, the next step will be to convert the image into a .tif file so that you can work with it in Photoshop. I’m doing this here using Adobe Lightroom, though the tools that Adobe Camera Raw provides with Photoshop are the same. In the process of converting, I also automatically do two things on every image. The first is to correct my color. To do this, I simply select the White balance tool and click the eyedropper on my white card. Lightroom will auto adjust temperature and tint and, though occasionally I might tweak it further, it usually dose a very good job. The next thing I do is correct lens distortion, which is done by clicking “Enable Profile Corrections” under the “Lens Correction” menu. Lightroom reads what lens/camera you were using and applies the appropriate template to counteract distortion and vignetting. Additionally, you should set your camera profile in your raw conversion program to match your camera. The default on Adobe programs are set to an Adobe profile, which is pretty good for Canon and Nikon but funky for some others. This is in the Camera Calibration tab. Once you set this, it should remain that way for future imports.
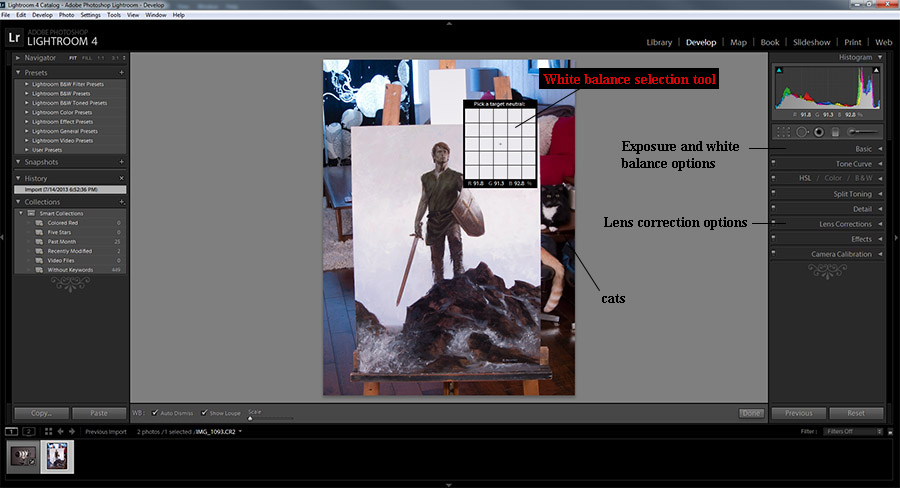 |
| Adobe Lightroom |
Once the image has converted to a .tif file, I do whatever final adjustments are needed in Photoshop. For me, this usually means cropping the image to just inside the edges of the artwork. If it was not quite squared up, I will “select all” and transform/distort to pull the corners into place, recrop if needed and then resize to make sure that it is the correct proportions. Add sharpening if needed and then tweak the curves to get it nice and punchy. Finally, if needed, I will spot heal any specks of dust or cat hair that are visible. This only tends to be needed on darker paintings.
And that is all there is to it! Save your file and drop in into the client’s FTP and you’re good to go!
Results:
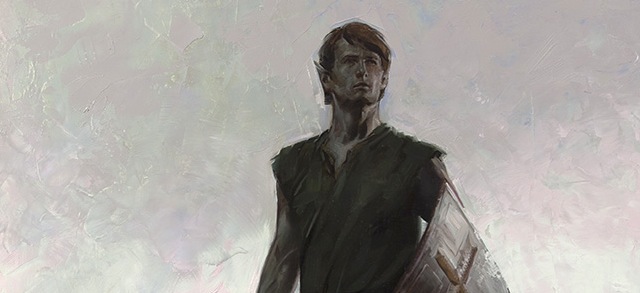
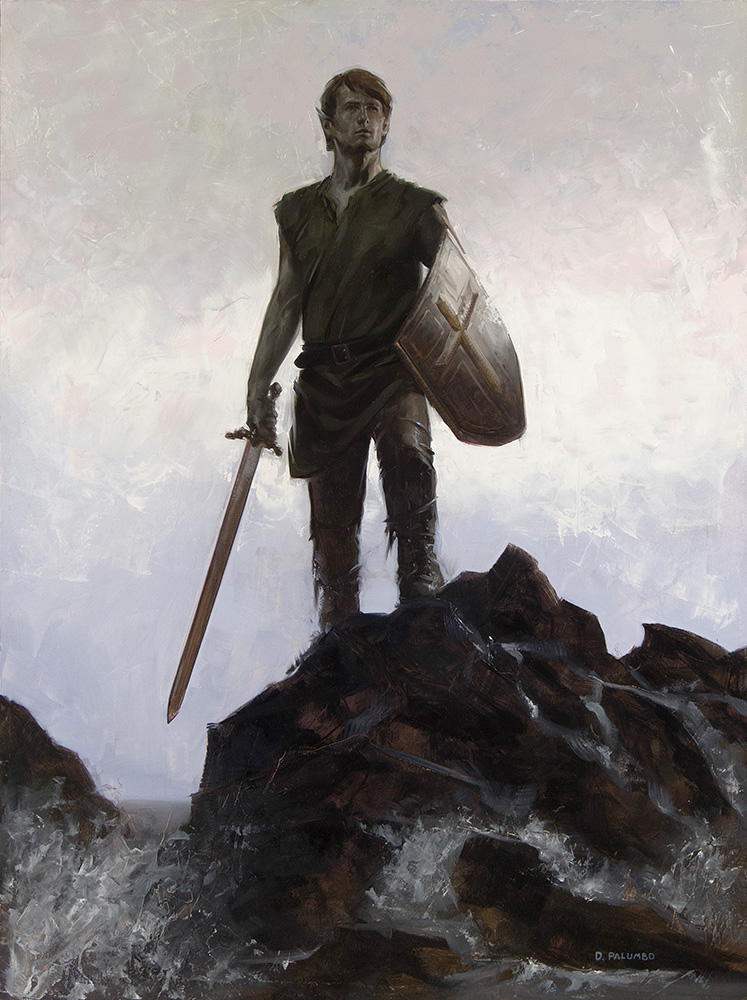
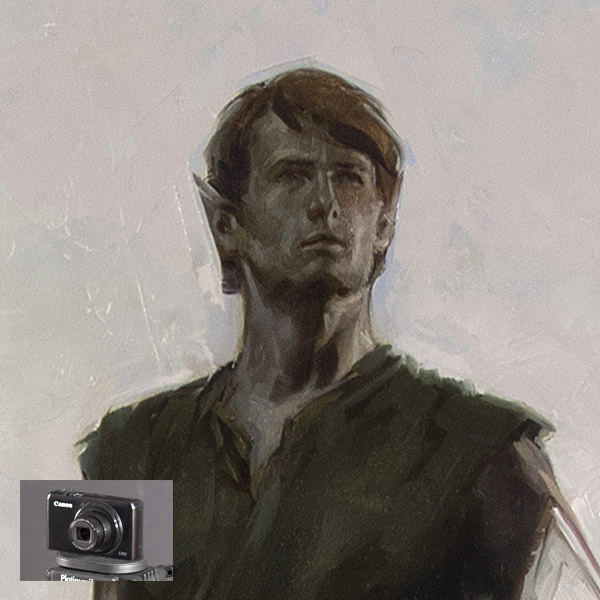
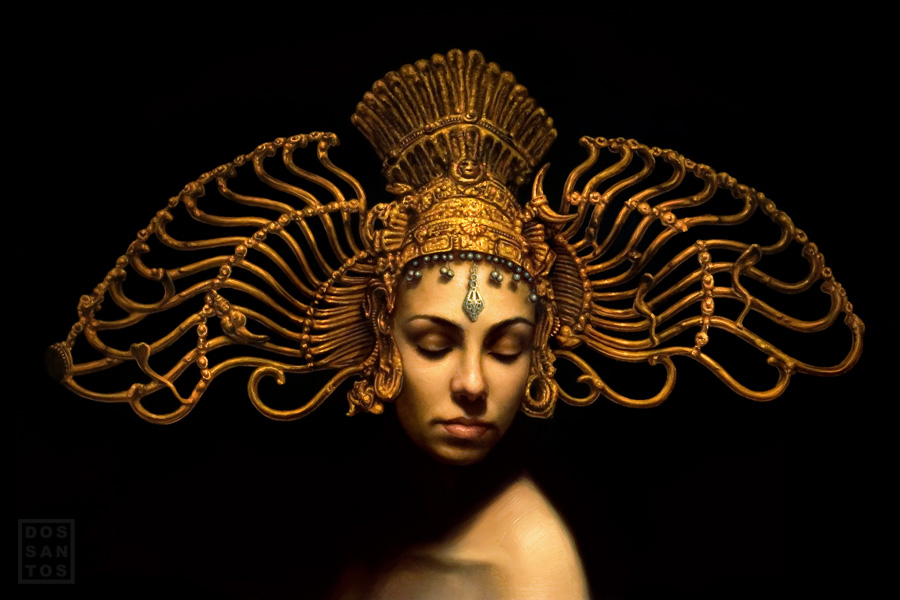
Above: The final image taken with the Canon Powershot S90, and a detail. I would be perfectly comfortable delivering this to a client.
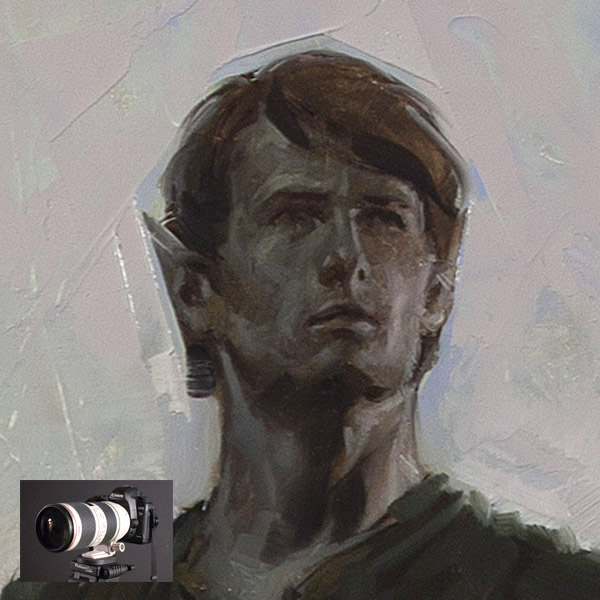
Below: The final image as shot with the 5d Mk2, and a detail. Cleaner color, higher native resolution (about double), and slightly more subtleties in tonal range, though still the results are near identical when reduced and converted to web images.






This looks pretty solid, but I have two or three thoughts:
1. Shooting with a window/large light source in the background as shown in the photo is likely to cause problems with less superior lenses (veiling, lens flare, etc.). It would be better not to have a light source behind the painting (in front of the camera).
2. I've never done this (photograph artwork professionally), but I wonder if a macro lens like a 105 might not work just as well or better for this purpose and save some money.
3. The book Light Science and Magic covers photographing artwork (including in museum situations where you can't move it) in some detail, and mentions as a last resort using polarizing filters on your lights and camera. That is, you shouldn't do this if you don't have to; but if you are having problems with glare on the painting and can't possibly move the lights, camera or painting to fix it, this could help.
This is an excellent post. I understand several processes much better, including one of the benefits of Lightroom vs. Photoshop.
Glare has always been my biggest concern, especially unwanted specular highlights. I'll have to experiment with your settings.
Thank you very much.
I've never had any problem with that window with the shades drawn. A good point, though as you see the $200 point and shoot handled it just fine. An unshaded window durring daylight would be an issue, as would one behind you for reflections. Shooting at night is generally easiest so far as that goes.
As to a macro, that should do fine but wouldn't really have an edge over a standard lens unless shooting miniature paintings as the only real difference is a closer minimum focal distance and I don't generally want to or need to be that close. Sharpness and clarity are more about build quality than anything else
I've read about the polarizing method but have yet to try it. I know a few people who like it, though with this setup I rarely have any glare that I can't manage with a black drop cloth. I don't think it would be possible on a point and shoot but certainly an option to considder with DSLR
I vote for more posts by Palumbo. (the artist, not the creepy body builder)
It's shameful that art school don't teach students how to do this.
Maybe they do now, but I was an illustration major who graduated in 1999, and no mention was made of it. Sad.
Thank you, David!
(art schoolS, that is.)
Thanks Dave. I'm sure I'll be referring back to this post for some time to come!
Do you have any suggestions for lighting while in the process of painting? I sometimes run into issues with my hand casting a shadow over where I'm trying to paint. Maybe I need more light sources? Thanks!
Great tutorial Dave! I have the same camera, the Canon S90, which is an excellent camera for it's size. I have found that it does not replicate high chroma violets and purples very well. After some research, it seems that many prosumer digital cameras are weak in the violet range.
I tend to frame my artwork as close as possible to the edges to get the maximum resolution that the camera has to offer. Another good tip it is to use a calibrated monitor, otherwise color correction is a waste of time.
Recently I had a few pieces photographed by a specialist with an 80 megapixel high-end camera. The color accuracy and detail far exceeded what I was able to do with my equipment. But then, it cost 35.00 each! Unless the artwork is really special, it is best to do it yourself.
I was JUST lamenting that I didn't know how to photograph my traditional work! Scanning just isn't cutting it. Thanks, Dave!
Maybe I passed over it, but I don't believe it was in the post: from what I remember the older s90 model used to be able to shoot in RAW…is this the case with yours?
More Palumbo posts!
Great post! I'm familiar with film slr and photographing artwork…the info using digital was very helpful to me. SInce I photograph 2-d and 3-d, I'd like to read any suggestions you have for shooting digital 3-d especially lighting tips. Thanks!
So great this job.
I take it back about macro lenses actually. though there are plenty of non-macro lenses that will deliver superb quality, I've learned since writing this that you can almost always count on a macro for optimal rendering. I wouldn't insist on using one, but if you can afford it they are a solid choice
Macro lenses also produce an incredibly flat field (typically), which is better for reproducing artwork. I use a Nikon 55 macro most of the time for this purpose.
Thank you very much for this detailed post! Do you have any tips for shooting wet paintings? I have a friend who is a professional photographer who helped me with my setup, which is very similar to yours. However, when I asked him about shooting wet paintings, he said “wait till they dry”. I'd like to post them on my website as soon as they are complete. Any hints? So far my shots have come out with intense glare.
Excellent article and update!
Throwing out a consideration for Canon DSLR users…
Canon has a “diamond in the rough” in their lens line that can serve very well for copy work: The EF 50mm f/1.8 II. This little lens almost looks out-of-place on a big DSLR; it's small and light, with a plastic housing that lacks the polish and detailing of Canon's higher-end lenses. But what this lens lacks in outward beauty it more than makes up for where it counts–image quality.
The optics in this little gem are remarkably fine, orders of magnitude better than the middling zooms that Canon tends to package in kits with their entry- and mid-level DSLR's. The lens delivers crisp, sharp images with excellent color and contrast and beautiful tonal quality. On an APS-C sensor body (all of the new Canon bodies below the $3,000 retail price point), the 50mm 1.8 is effectively an 80-ish mm prime, which is a great telephoto length for copy work (and portraiture for that matter!). I shoot with a Caon 70-200L 2.8 frequently, but this little 50mm is my go-to for copy work because it just does the job well.
The kicker? The lens retails for just over $100, unquestionably the best cost:value ratio in the Canon lens line. As previously discussed, a dedicated macro (Canon's are beasts!) is likely the best there is at resolving absolute detail; but for the money, this lens is truly remarkable.
The blog has comprised with many great features because of this quality it is perfectly nice! Visit Website
just found this. great primer–simple, well written, very comprehensive and the best part, free.
thanks
Great information, thank you kindly for taking the time to share with us!
Great information, thank you kindly for taking the time to share with us!
hey, sorry I only just saw this! Actually, I prefer shooting a painting while still wet because the color and tonal range is fresh and punchy. Once it dries (with oils) the blacks grey out and the color loses some zing, so I'll give dry paintings a retouch or final varnish to bring them back to life. The only time I'll wait for it to dry is a half wet/half dry painting, where I want to have a uniform reflective surface.
There are a few ways to handle glare. The more of these you can do at the same time, the better:
– shoot in a non-reflective space (the ideal room for shooting artwork would be one with velvet black walls, ceiling, and floor). Any light sources, white walls, your white t-shirt, etc will show up in your shiny dark areas the same as they would in a reflective surface like a mirror or window. Controlling the environment is the first, best, and probably least practical solution.
-hang a dark backdrop behind the camera. If you can't change the room entirely, at least block any reflections coming from the area immediately behind the camera. You want the space behind the camera as dark as possible
-get some distance between the camera and your painting. Think of your painting like the surface of a mirror. The closer you stand to the mirror, the more of the room behind you will be visible in the reflection. When you back up, the reflected area becomes smaller. This makes it possible to mask off the areas as described in the last point. In addition to killing room reflection, you also reduce specular highlight glare the further back you are.
-make sure your lights are not too steeply positioned. This was described in the original post, but worth checking again. Shallow raking angles produce less glare. If you use the tripod long exposure method, you should be able to see if there is glare on the surface before placing the camera.
Most of the time, issues like this just come down to figuring out your room and how to arrange everything. I rarely need to hang a black sheet, but that solves the problem for me when necessary. If your surface is unusually reflective and it just isn't working, you can try the polarizing filter shooting method (there are a few tutorials floating around for this) though I've never tried it so I won't go into details on that. It always felt like more set-up and work than I wanted to do, though I know a few people who swear by it
True, there are some incredible quality cheapo lenses out there! The 40mm 2.8 pancake is another. Unbelievable image quality. And for those with an interest in something way off the beaten path, adapted manual focus lenses can be another option. I've found in particular the Olympus OM mount stuff to be an incredible value
Do any of those point and shoot ones have a decent size image sensor? The DSLRs are quite expensive.
Thank you! I've shot work for years…but really needed the extra details you've supplied to take the stress off.
Hi, I have been trying to photograph my artwork. I found your post a little while back and thought I'd put it into practice, but I a tad confused about one thing. You mention that one shouldn't zoom in but fill the frame with the image yet you're suggesting a zoom lens and zooming in part way. Can you please explain that, maybe I have misunderstood!
they change so often as new cameras come out, you just need to look at the info supplied for any given model and compare. Point and shoots traditionally have very small sensors, though recently some companies have experimented with larger. You can also get a really good price on used equipment which is out of date, particularly camera bodies (lenses hold their value a long time if treated well). Just because it's not the newest doesn't mean it can't still deliver so long as it meets baseline criteria (manual control, megapixels, etc.)
the problem isn't zooming, but digital zoom. With an optical zoom, the focal length changes because elements in the lens move. Digital zoom just crops the image and then enlarges the cropped area digitally. It's about the same thing as increasing the size of an image in photoshop. The computer invents pixels between the existing pixels and the result is a lower quality image. A good example is zooming in with a phone camera.
Are these rules basically the same for taking photos of my large framed photographs? They are all in a large frame with a glass cover. I always have a horrific time with the glare on the finished image.
Thank you
It’s worth a try, though that definitely sounds like a worst case scenario between a large piece (which will force you to get further back to reduce room glare) and a highly reflective surface. If possible, I would shoot these in a room with as little room reflection as possible (high ceilings, dark floor, dark walls or backdrop behind the camera) and back from the work as far as you can get.
This is just theoretical in my mind, and possibly overkill, but I feel like an ideal way to shoot something like this would be if you could set up your easel and lights outside at night with no light sources behind you (if you have a backyard that just faces trees for example). With no ceiling or walls to reflect, the only trick would be lining up your lights and positioning your camera so that they leave no direct glare or reflections in the glass.
Holy moly! The link-bots are out in force! Great article, shame about the link-spammers making it hard to find real Q&A.
A Kodak Grey card should be mandatory for not only checking colour temp in post, but for initially nailing exposure first.
Every camera lightmeter, every hand held lightmeter ever made is calibrated to 50% grey (18% reflectance). This is what the grey card is. Incidentally green grass in sunlight is also 50% grey!
Take your meter readings from that and you’ll be dead on.
You should also shoot to the histogram. That thing in Photoshop called Levels is a histogram, your Digi camera may have one and display it on the screen while you shoot. You want the whitest, brightest part of your image to register just inside the extreme right edge of the histogram.
Lightroom isn’t essential, camera raw in PS can do everything required here. Camera raw (as with LR) will allow you to export out 16bit tif files. The greater bit depth contains 1024 levels of grey per colour channel than 256 of 8bit images. Do as much as you can in camera raw, then all your image editing in 16bit in PS, then save out your final 8 bit tif for clients. Keep your 16bit version as back up.
Always shoot at the lowest iso possible. The finer the noise the finer the details. Digi cameras also have what’s called native iso, my Nikon D850 and Z7 is 64, my Olympus is 200. Everything else is amplification of that signal. So the more you amplify the signal the more distortion you introduce. Most modern cameras do pretty with this now.
As artists you should all already know this, but angle of incidence equals angle of reflection! Same applies to positioning of your lights to the painting surface.
Anyway, hope that also helps.
Absolutely right, thanks Wayne! These all reflect my current habits and I’ve incorporated more up-to-date info into the post 🙂