I’ve talked before about artistic training: specifically the idea that, as artists, we can engage in training exercises outside of “completing finished images” that will make us better much more quickly, or in much more specific ways. Artists who seem to just “have the knack” have often intuitively tapped into training mechanisms as a part of either their process or their sketchbook habits. But for the rest of us, training can be put to work a little more deliberately. Below I’ll give an example of a training exercise I’m engaged in right now to help ground all of this out in reality, but first let’s talk general theory.* How can we train effectively?
1. Have a clear, specific goal. We can’t focus on generalized improvements. We have to go at it bit by bit, and no skill is too small. “I want to make better paintings” is not a goal that can be trained deliberately. “I want to understand how light hits a cube;” now that we can go after. It may seem a bit arduous, but this is actually the fast way because it creates permanent, cumulative results. The beauty of well-designed training exercises is that they pay off remarkably quickly. Soon you are using the new skills whenever you work, which keeps them with you, and you’re off to something else.
2. Design an exercise that will achieve the goal, as an actionable skill. It isn’t enough merely to “know” something. I’ve met a lot of people who know all about painting, but can’t seem to paint. Good training results in skills, not just knowledge. Is knowledge important? Of Course! But when you focus on skills, knowledge comes along for the ride; it has to. The opposite isn’t true.
3. Get feedback. This one is tricky for artists, especially early in their development. It’s easy to say if the ball went through the hoop in basketball; but does this new style look better or worse? And which colors should I use together? This is why I always recommend starting with a solid teacher. Good teachers target your weaknesses with custom-tailored exercises designed to give you the right sorts of understanding. It is this understanding that will enable you to become your own feedback source, and nothing could be more valuable to your long-term development. Still, because many of us must go without teachers from time to time, or because we want to train something that is new or very unique to our own work, we can try to find ways to bake the feedback into the exercise, or to get feedback from existing sources like the internet or books. More on that later.
4. Repeat, repeat, repeat as necessary. Often the training will be very difficult at first, but through repetition the brain finds ways to understand the material differently, so that it becomes easy. The brain wants things to be easy. Once a skill you’re training becomes easy for you, move on! Don’t linger on exercises you mastered long ago. Get used to the thrill of “Oh my God I suck at this!” That feeling is the real feeling of progress being made.
It sounds so simple. Make a goal, then practice the skill related to the goal; but for a long time I had a tentative grasp of these concepts, yet couldn’t seem to apply them at will. The main challenge was feedback.
Remember that a teacher gives you targeted exercises, designed to share with you an understanding. But you need the understanding in order to design the exercise! And you need to know exactly where you’re going wrong to target those weaknesses. You can see the predicament any beginner is faced with. That’s why it’s worth any amount of money, time, or discomfort to have a good teacher introduce you to the fundamentals. Excellent working concepts of color, value, perspective and drawing have been built up for hundreds of years by other artists; there’s no need to reinvent the wheel, and not enough time in the day. Start with a teacher.
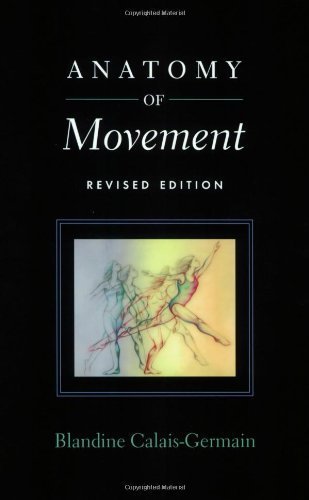
Still, there are some understandings an artist will need that have been well built-up and that exist in books or on the internet. For example: human anatomy. A while back I “worked through” all of Blandine Calais-Germain’s Anatomy of Movement, but in the end I had a lot of nice drawings and not a lot of understanding, and almost none of the skill I wanted. Hrm.
How could I turn working with this book into effective training? Well, let’s go through the list:
1. What was the skill I wanted? I wanted to be able to draw complex human actions from my head, accurately and with a high degree of “realism.” That is an extraordinarily complex skill (and definitely not necessary, by the way – this is just for fun), so I tried to break it down into smaller parts.
I had other exercises in place to deal with “realism,” and “drawing,” so my main focus for this exercise would be the body. To draw the body in motion I would need to understand anatomy not in a static sense, but from a functional point of view. I wanted to think of muscles as the actions they generated, and vice versa. Then when I thought of an action to draw, I’d know which muscles were employed, and how those changes would be reflected on the surface of the body.
But those are later steps. Right now I was trying to build the alphabet of this language, the smallest, most basic components. I needed to know the muscles and bones, and understand how they work together to generate movement. I needed a concept like “the alphabet song” to help me put it all together and remember it. This is what led me to Anatomy of Movement, instead of a more typical atlas of anatomy, where everything is understood only in terms of names and the only positions shown are standard anatomical positions. So far so good.
2. How had I designed my exercise? I had gone through the book once and drawn along with the diagrams, and read everything and tried hard to understand it. Oh wait; crap. First of all that’s not much of a “design.” Also I made the classic mistake of focusing more on the knowledge than on the skills! What skill am I employing to copy the book?
3. How was I getting feedback? Each day when I turned to a new page of the book I would try to redraw everything I could remember from the previous day’s work, at new angles, and explain what I was drawing to myself. Once finished I’d consult the pages from yesterday and see how I did. That was about it. This in and of itself isn’t too bad because the book contains perfect feedback. Except that…
4. Was I repeating the exercise? Not really. I didn’t have any procedure in place for repeating the drawing until it was perfect in its understanding, and I was never reviewing more than one day into the past. After a few months, how much could I still produce on demand from 60 pages ago? What was even going on 60 pages ago? I couldn’t say.
So, 2 out of 4. Ish.
Eventually I keyed in on the idea of using a flashcard system to generate random, daily “challenges” that would act as the exercise. This would serve as a much better design because a flashcard could demand a drawing from me, or a piece of knowledge, or anything, really. Then, on the back I could have answers (either drawings or writing) that were referenced to the book. Boom; feedback. And in the case of cards that asked for drawings I’d be building real skills.
But how to build this pile of flashcards? The task of turning the entire book into cards seemed pretty daunting, and on top of that it would be a lot of work to get a random grouping of challenges each day. Further, I’d face the difficulty of trying to target my weaknesses the way a teacher could. If a flashcard was difficult, I’d need to see it more often to be training effectively, and doing easy cards over and over would be a waste of time.
It was at this point that fellow illustrator Micah Epstein recommended Anki, a free flashcard program that he’d used in studying languages. With a digital program a large deck would be much easier to manage, and became less daunting. Not only that, but the program accepts all sorts of inputs for flashcards. You can make the front or back of a card an image (scanned drawings, bingo), any amount of writing, or even an audio file.
The real kicker is the way Anki handles the “targeting” issue. When you fail a card, Anki makes you repeat it within the current study session, then makes sure you see it again often, until you’re nailing it every time. Each time a card is “passed,” Anki increases the amount of time between now and when you’ll see the card again, and all these things are customizable! Basically, you only see the cards you need to be working on right now, but over a long time span Anki keeps you accountable to all the knowledge and skills in the “deck;” a training MACHINE!
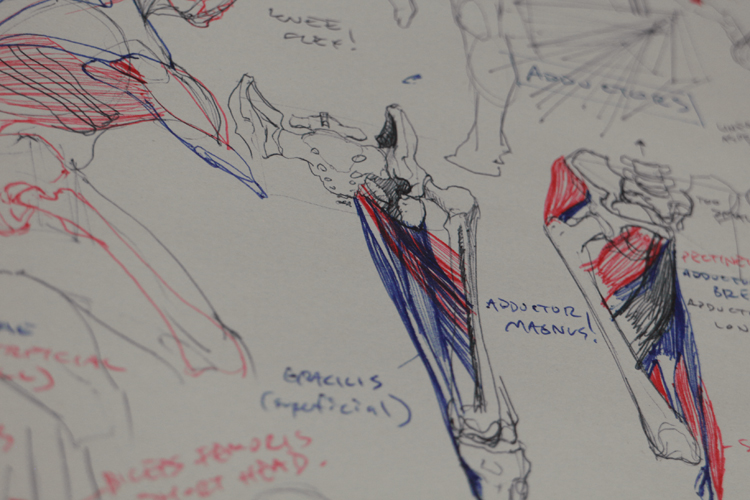
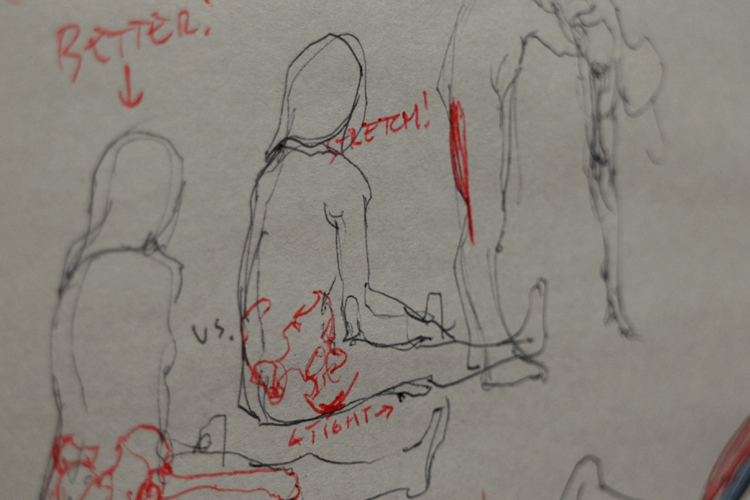
So, using Anki, what does my anatomy training currently look like? Each day I get out Anatomy of Movement and tackle just a single new page. I try to convert every bit of knowledge on that page into flashcards that will tax any skills and all the knowledge I can find on that page. They look like this:
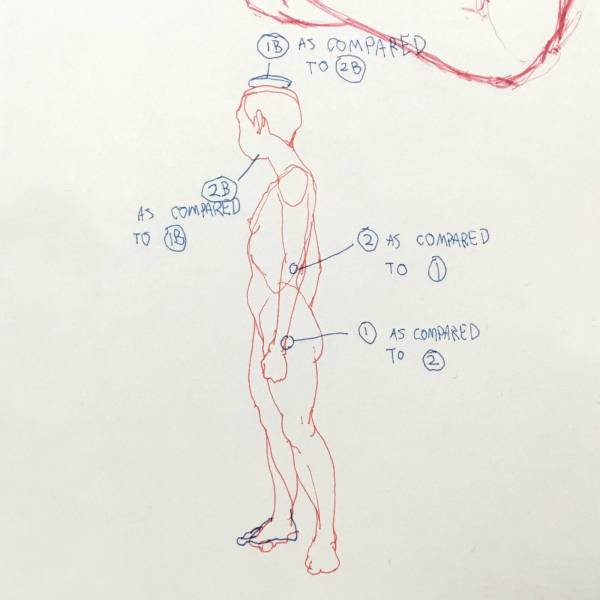
And sometimes, like this:
These are slides I hardly ever see anymore, because they’re basic vocabulary and concepts that are needed for further study. And yep, they’re ugly. But I’ve found it to be a good rule of thumb that if training is pretty, it’s probably either not working, or you don’t need it anymore.
Sometimes now a card will just say:
“Quickly draw the cervical spine in a non-standard anatomical view. Don’t be boring.”
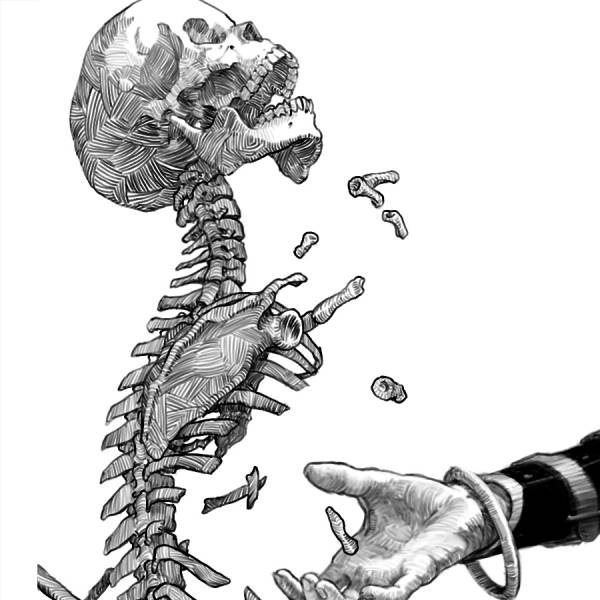
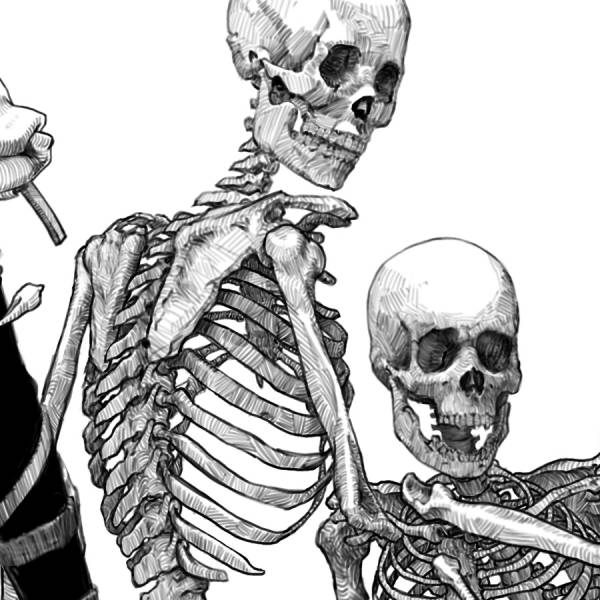
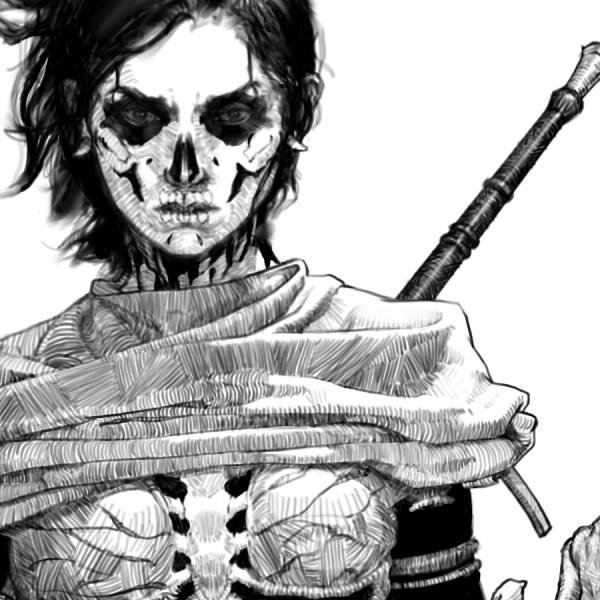
These are the really good cards: the ones that build a skill. When on earth will I need this skill? Actually, all the drawings of skeletons from Harrow the Ninth I’ve been peppering throughout this post were done predominantly from memory.
Once I finish the drawings for the cards I photograph them, then convert them into actual flashcards inside of Anki, and add them to my running “Anatomy” deck. Then I do a study session using Anki, which by default includes the new cards, and anything Anki thinks I need to study. The session is capped at 25 cards and I’m done when I’ve gotten every card right. To put it another way: I engage in an exercise repeatedly which tests skills and which includes perfect feedback, and the exercise is targeted to my strengths and weaknesses. It takes only about 30 or 45 minutes per day, and this has proven remarkably more effective at building the actual skills and understandings I’m after.
Of course, I still have a lot of work to do; this is a long-term exercise regimen and only the first step in a much longer training chain. But it’s just one example. Many other types of training I’ve done have taken only a very short time to have their full effect. The key is that this basic 4-step format can be applied to anything YOU want to learn. As artists we have to chase our fancy; we have to do what thrills us. Whatever you’re trying to achieve with your work, hopefully you can find some ideas here that will help you get there. Godspeed!
____
* For a deeper understanding of this theory, I refer you to Peak, by Anders Ericsson.








Really wonderful, you should consider writing a book that brings the concepts from Peak (and dedicated practice) to art and what best practices you’ve found to gain knowledge and ability, you have some wonderful insights and an engaging writing style that I’m sure would help people a great deal. Always a pleasure to read your posts, thank you for sharing.
Thank you so much! I’m really interested in writing something like that at some point, but for now I feel like I’m still just testing a lot of this out on myself. I’ll need a bit more time…but one day! Writing the articles here is a nice way to start honing the communication of the concepts, and seeing what clicks, and what comes out garbled. It’s like I’m deliberate-practicing that book 🙂
Hey Tommy, this is a great post, and very insightful!
One followup question though, with your “quickly draw cervical spine” example, after you’ve photographed it and put it in your anatomy deck…what do you do when it comes up again?
I assume you might say draw it again, but then my question is how do you fact check yourself in Anki?
Thanks again, love your posts here!
Ah; sorry for the lack of clarity there! In this case “Quickly notate the cervical spine.” was the original card. At that time the answer was usually drawn in anatomical position, so the reverse side of the card was a drawing I had done correctly from the book. Usually, though, you know if you get a card like this right before you flip it over, because in drawing something you have to recreate it mentally. So, when you reach for that shape at the back of the 4th vertebra and come up short, you have to admit you don’t know, and click “fail” on the card. At that point I’ll go back and re-study the area in the book (my main feedback source early on).
Later it became easy to nail that area, so I updated the card to include the second part about a non-standard view. For checking these drawings I use an app called “Essential Anatomy 5,” which lets me move the camera all around the body, zoom in on areas, and isolate specific areas. Here’s an example of how the cervical spine looks when isolated in the app, and seen from a non-standard angle: https://1.bp.blogspot.com/-CPayB6garF0/Xt6MHfGrjFI/AAAAAAAAFRg/W_AYwIWAfPo40x-l98OsqbgZGaUc6j33QCLcBGAsYHQ/s1600/IMG_0677.PNG. This lets me find out if the little curled areas overlap the way I thought they would, and get feedback about another way it could look. I’m ambitious of the day when I draw a bit of anatomy that looks cooler in my sketchbook than the app can make it look. A man can dream!
Dude, you’ve made my day.
Thanks so much for replying, that makes a lot of sense, and sounds very applicable to what I am currently studying!
Thank you for sharing this whole walk-through of a way to improve our practice! I think Duolingo does a good job targeting (with languages) like Anki does – have you learn new stuff, and review well, focusing more on what the trouble is, while always making sure to throw basics or fundamentals back into the mix.
I’m still a little confused: with the non-traditional spine example, does your explanation mean you would draw the spine from memory, then use the app to find the section you had drawn and check it then? Or do you use the app for photo reference of your drawing?
Thanks again for sharing this method, I’m gonna start trying to use it to push things. (I need to figure out how to use the method to push dynamic figures….)
Great post. Very interesting study process you’re developing. Another great resource that you and your readers might take advantage of is anatomy4sculptors.com. The book is very good at covering bone and muscle configurations in movement and they have videos on Youtube as well. I found them awhile back and keep thinking I need to do the kind of in-depth study that you’re talking about.
Yes; those books are amazing!
I always find your articles quite intriguing and insightful to read. Would also be interesting to see some of your process of coming up with illustration at some point in time, on a video format. 🙂
Awesome post! I struggle with keeping good habits going, so any system is welcome.
Wow Tommy this Anki this is pretty exciting. I think I found a way to do quick BWG studies. For the answer image I just use a photoshop filter to create a rough 3 tone of an image and boom you have an “answer” you can study.
https://imgur.com/a/wTGoQyj
Actually I’d stop using that method as an answer entirely; it is more likely to form bad habits than to help! Unfortunately such filters don’t really get at the true nature of a design, and they include a lot of superfluous information – artifacts of light and little gradations, etc. – that are what we aim to avoid. Very soon I’ll be posting an article with a lot of examples of completed BWG studies, and some example “test” pieces that people can do on their own, with all the answers at the bottom of the post – hopefully that can help! Unfortunately, seeing clearly in BWG often takes a lot of one-on-one instruction, but over time I’m trying to develop a training regimen or program of study that can be passed on in some other way.
Thank you! I’m glad I posted instead of blindly charging forward. I’ll look forward to your post on BWG since doing them as a solo exercise has been awkward and bit discouraging.
Nice piece, Tommy! I used a targeted program of my own to get a handle on human anatomy myself (after that didn’t magically happen from years of life drawing).
I used 3d models (skeletons, ecorches). I divided up the body into four or five sections, with overlap (head/neck, neck/torso, arms/shoulder, etc.). I started with a “before” test, drawing (from memory) different parts of the body from all different angles and all different poses. What a disaster. But this approach makes what you DON’T know crystal clear.
After that struggle, I went to the models, and corrected. Then I spent a week on each area, always drawing from memory THEN looking at the model and correcting. Everywhere I was, sketching, doodling, it was just arms, arms arms, or whatever. It really worked well. It’s a shame artists get so little formal TRAINING like this.
Nice I used anki to Identify value scales by numbers. Simply put the values and you have to guess and then flip
I can now tell values and identify them by their numbers when I see them
That’s an awesome use of it! I’m doing something similar right now with HSB color identification…
Nice I might want to do it too, how do you set it up for HSB?