-Guest Post by Randy Gallegos
1982’s Atari 5200 console only managed about 1/30th the sales of the blockbuster 2600, which was a catastrophic decline. So rather than talk about it, let’s talk about my paintings of the system and controllers, because there was a lot of fussing over creating these paintings that will likely go unappreciated due to broad lack of interest in the subject.
First off, it is solid business advice to say that one shouldn’t paint what one knows there is little interest in. You might not know that what you are painting will find little interest, but if you do know it…. However, my Hearts for Hardware series, celebrating the history of (mostly) video game hardware, requires attention to some underappreciated and even failed hardware. So while there might be some fans of the 5200 who loved it dearly, painting it is probably more for personal interest as well as for the sake of my larger goals as a series.
From its inception, this series was a way to experiment–what better place to play as a painter than in painting objects meant for play! My work as an illustrator requires that any changes to my style be so gradual that they go unnoticed by my clients. But like most artists, I am curious and enjoy trying new things. So finding outlets to do just that was important to me.
Through the series I’ve played with texture, knife painting, surfaces, brayers, and leafing techniques, among others. From there, some of those techniques have found their way into my other still life and landscape work, and some even into my illustrations for Magic: the Gathering.
But the series on its own has always been for collectors as well, within the venn diagram of retro video game and original art lovers, and those who know my work in fantasy gaming. Turns out that’s a decent overlap.
What that means is that for paintings in this series that I think will find a home due to the popularity of the subject matter, over time I have felt the pressure to experiment less on those, lest their marketability be reduced by some odd thing I was trying. Which starts to defeat one of the purposes I had from the outset.
So when I paint hardware with less of an installed base, I am more likely to try things a bit farther afield. But I still want the work to be worthy of showing, so trying things so far out there that I end up trashing the results is not in the interest of my time, which is already in these cases being used to paint things with a lower likelihood of finding a home.
The 5200 system, controllers, and game cartridges utilize brushed metal plates (or the appearance thereof, on the cartridge labels). So for these, I wanted to try painting on aluminum panels, letting the raw aluminum carry those portions of the images. I had done similar with copper leafing when painting the Intellivision a few years back, so I had some familiarity here. But I had never painted on aluminum. Whereas normally I used this series as a test bed for techniques I’d use elsewhere, this was the first time I felt precious enough about a hardware painting to test elsewhere, first!
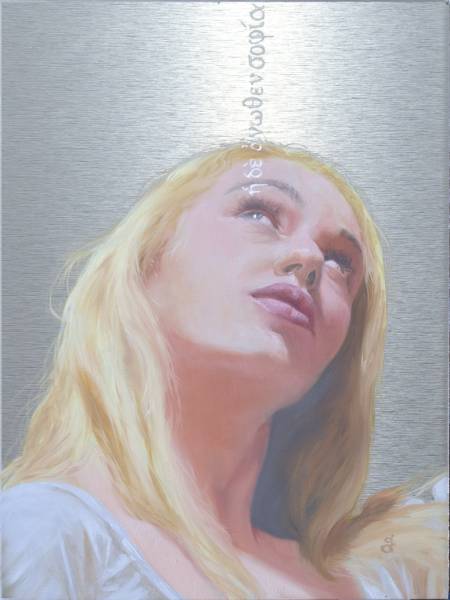
But where to go to experiment for an experiment? At the time (spring, 2020), I was contributing to Everyday Original fairly regularly, also using it to experiment, less with technique and more with subject matter, mostly in small works. I painted Anōthen, above, on the raw aluminum. It helped me understand the characteristics of painting on the panel, which is slick and a bit difficult to build up opaques with, something oil paint normally does very easily. It also helped me understand a bit about how to handle some edge control when the background is highly reflective. Basically, hard edges are best, it’s quite difficult to feather an edge into raw aluminum as the blended transition doesn’t read well at every angle. How the ambient light falls on the panel changes the apparent value of the metal considerably, and at certain angles your painted shadows can read as lighter than the reflected color of the aluminum.
These Alumacomp panels come with a single-directional textured side, which I used throughout, and a glass-smooth side, which I did not. The textured side was slick enough for my tastes, already! When finished, I only varnished the painted portion, as I did not want the varnish to break up the reflective qualities of the bare exposed metal. Howard Lyon previously posted about this substrate as well.
I was happy with Anōthen and, armed with the experience of this test, I began work on these paintings during the early phase of our pandemic lockdown. To help with the difficulty of the slickness, I underpainted in acrylic, which I often do with this series. Pencil works just fine, and you can erase pencil easily with a swab and high percentage isopropyl alcohol (I used 99% but Howard mentioned 70% is just fine). Damp swabs will also rub the acrylic off cleanly, so you can do reductive stuff with a little effort if you want.
I worked a bit back and forth on all three panels until I was called away to other projects. They stayed incomplete until the end of 2022. I was able to do a small amount of work on them in between, but not much. That these pieces were less likely to put food on my table meant they had to be lower-priority.
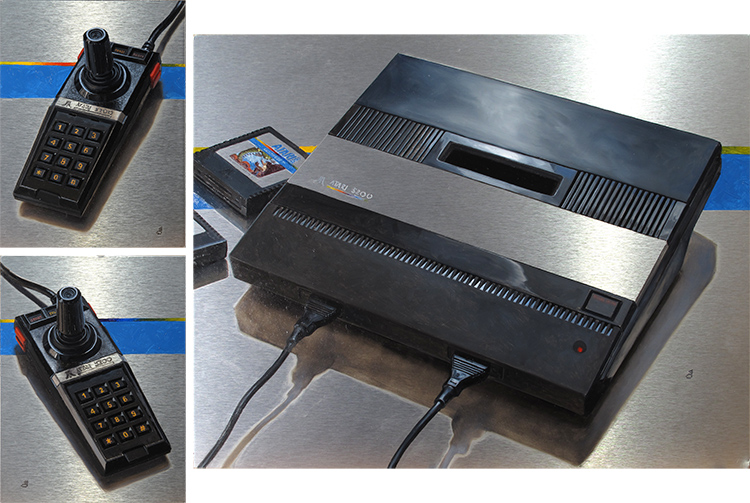
You can see the glow around the cast shadow in the darker exposure of the aluminum, where it is less visible in the photo of the finals because the metal is more brightly lit.
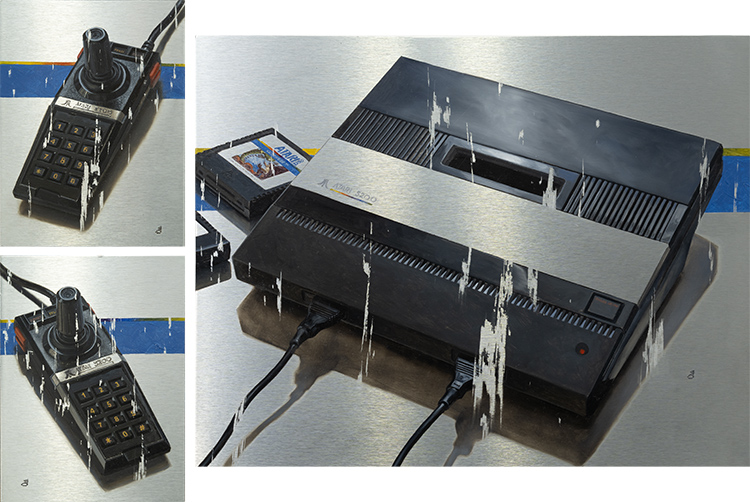
But finally I had them “finished” a few months back. Except they weren’t. One of the things I decided along the way was that I wanted to gouge or chip paint off, giving the pieces an aged or damaged look, taking those areas back to raw metal, reflecting the damage Atari did to its reputation and business with the mistakes made in this console.
So they sat a bit longer, while I thought about it and did other things. I attempted to test in Photoshop by layering aluminum texture under my painting’s photo on the top layer and “gouging” the image with digital brushes, allowing the under layer to show through. This didn’t help. And I knew there was a high likelihood that I’d ruin the pieces if I just dove in. So, one more experiment!
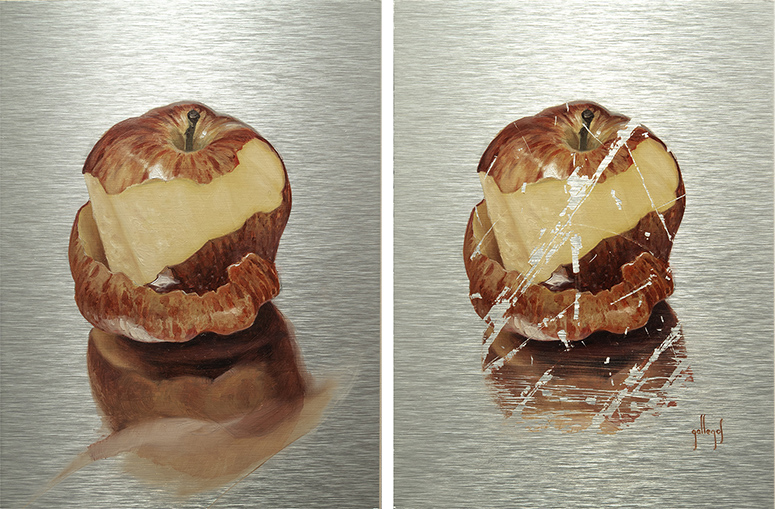
I got another small panel and decided to do a still life on it, something boring like an apple. And I’d do it knowing I’d probably destroy it, but I needed an actual painting versus paint blobs or swatches because I needed to feel the tension of destroying something real. But, I figured a boring apple wouldn’t present too much of a sense of preciousness.
So I set up to paint the apple from life, in one session. I stood the apple on a piece of aluminum so the reflection would be more appropriate to the surface. Of course, last second I decided to take a knife to it to peel a portion and add interest. So now it wasn’t going to be quite so boring. I also had to refer to a photograph I shot because the exposed flesh quickly oxidized, of course. I began with an acrylic underpainting and finished the session in oil, mirroring the build-up of the target hardware paintings, including varnish later.
Great, so now I had this still life that I liked and had to damage. I steeled myself and used sand paper and some wood carving tools. The paint came off as expected, but the sandpaper etched the surface in ways I didn’t like, which caught the light too much. The carving knives worked great and I played with them until I felt I could control them a bit. A swab in alcohol helped to clean up any residue in the gouged out areas.
I still kinda like the apple piece in the end, but I made sure to photograph everything beforehand, just in case. Had this whole experiment been a total fail, I’d have shown the apple and hardware in their original state and you’d have all been none the wiser.
The moment of truth came and I left the sandpaper aside, which was a good education, and focused just on the couple of carving tools I liked best. I also opted for a vertical-only destruction versus multiple directions, as its harder to “explain” the damage from every angle versus the single-direction look which looks like something heavy was dragged over it.
Finally, these paintings were finished, and I got two other small paintings out of the process. And learned a lot. Will I reuse that knowledge? Certainly, in some form, but not sure when.






Recent Comments