I’ve had a few inquiries about the process and specifically about how some of these recent paintings from my Bloom solo show started. So, the following images are a few of those paintings from that show, with an image of the initial start alongside the finished painting. I’ve included some information below each piece to describe how these paintings started and developed as well.

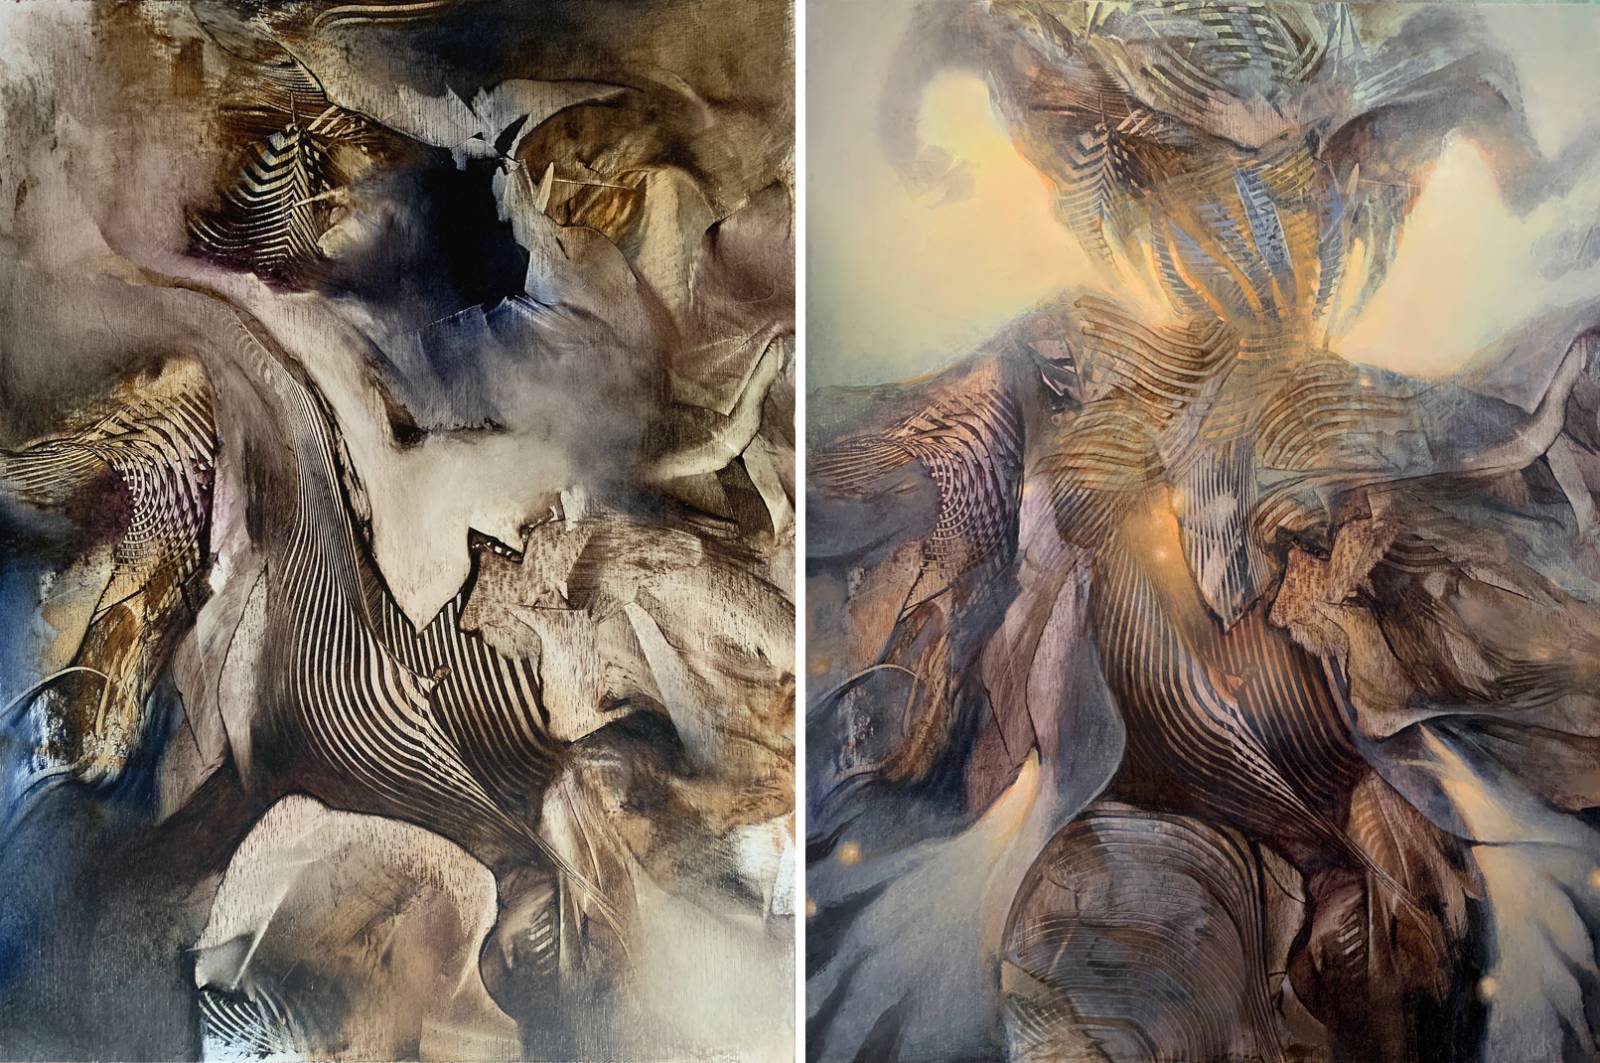
Rae, oil on panel, 16×20” (above)
For this painting, I started with a plan of creating the small splintered repeated marks over the entire surface with spatulas and acrylic burnt umber to create an underlayer of the illusion of texture to build up on. The marks are slightly raised but mostly smooth, and each layer is smooth overall, built up in thin transparent layers of oil paint onto the initial acrylic underpainting, and the paint is carved out with spatulas and a shower squeegee. The face was added on in the second layer, with simple forms ghosted in at first, which you can see in the right side of the face a bit. Then parts of the mouth and nose got another layer of finish, and the left side got yet another few layers of finish in the final/top layers, developing small forms and details. There are small areas throughout the entire surface that also had marks added in top layers to continue the feel that the spatula and squeegee strokes have that were loosely made, but some were strategically placed by painting them to appear as if they were part of the squeegee marks in order to help the flow of the whole composition.
_________________
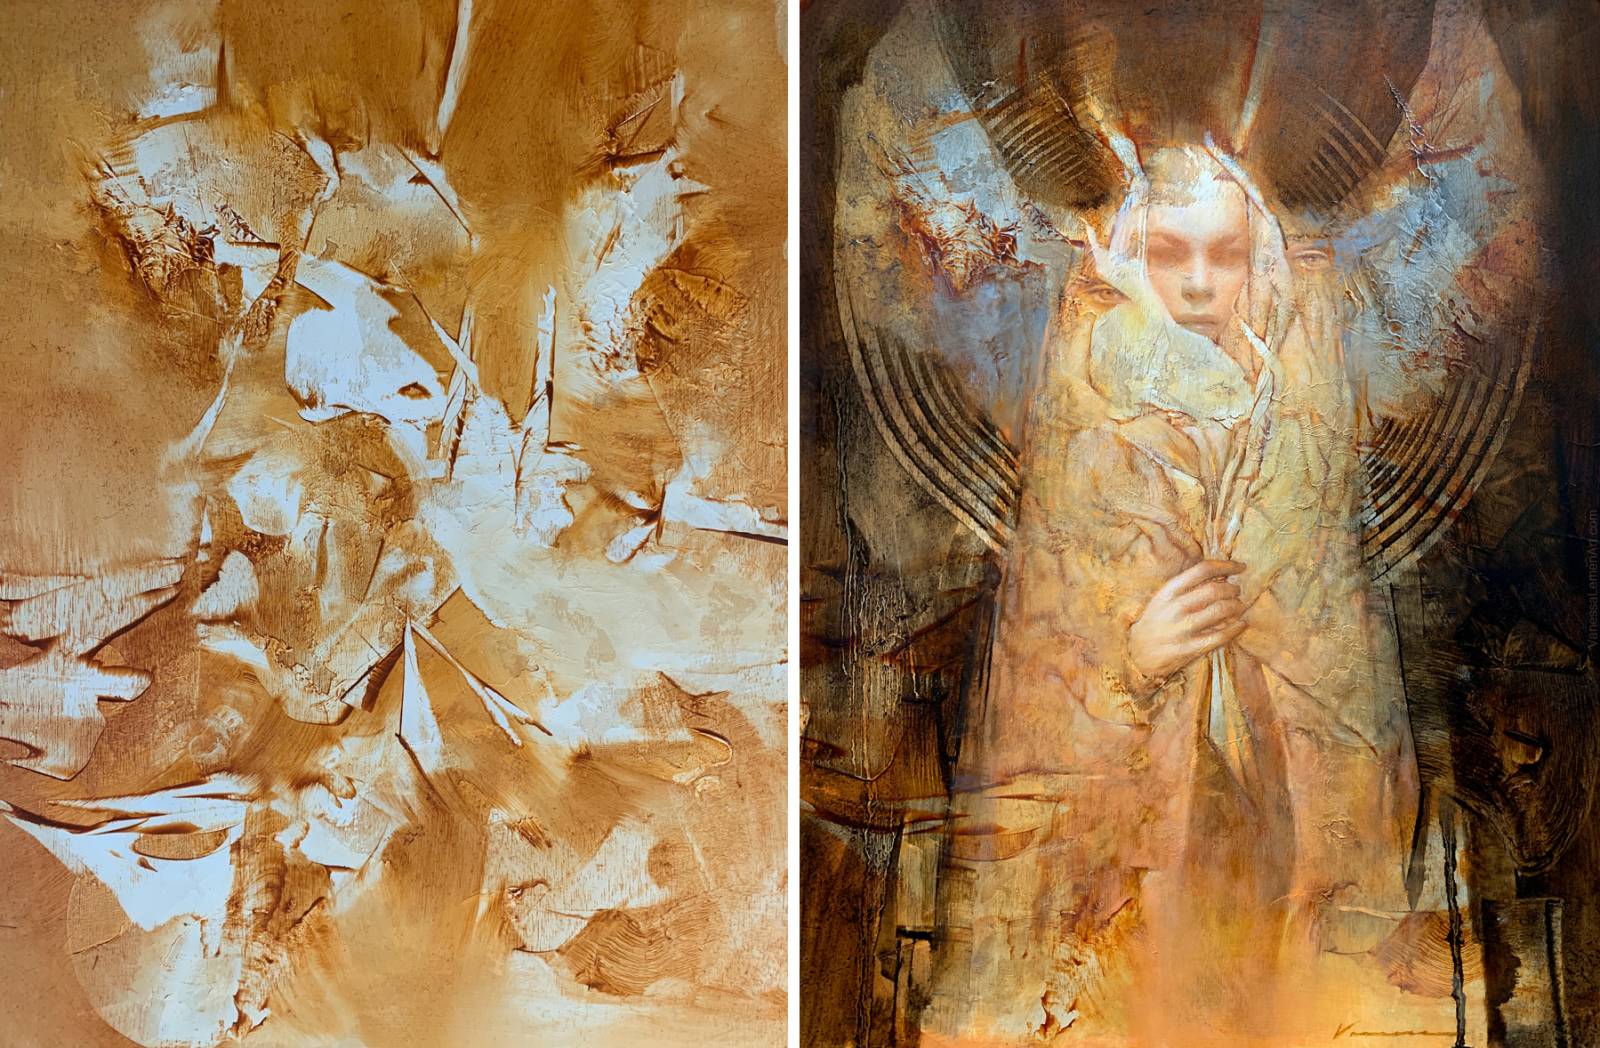
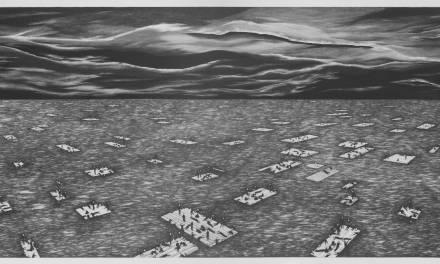
Shaman, oil on panel, 12×16” (above)
This painting was guided throughout the process by the initial layering marks from start to finish. I saw an indication of this shaman character with the contrapposto feel of the pose in the initial mark-making shown on the left and then as I built up layers of more marks, the character developed as it did to reveal a figure and glow and flowing sort of shawl-like veils in some areas. There were some areas of this painting, such as the face, that changed quite a bit from start to finish and some areas that developed gradually but kept the overall forms that were indicated in the initial marks. The title is Shaman because this painting really served as a guide to me throughout the development of many of the paintings for the whole body of work for this “Bloom” show and served as a reminder if I felt as if I were straying or wavering in the direction I was going in with some other pieces in the show at times.
_________________
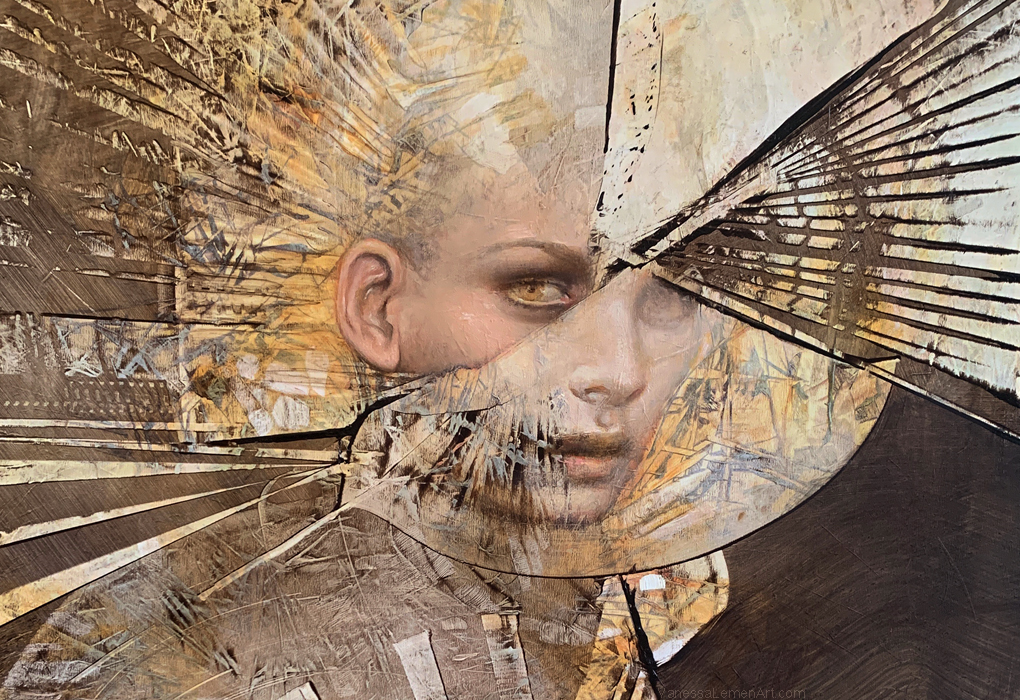
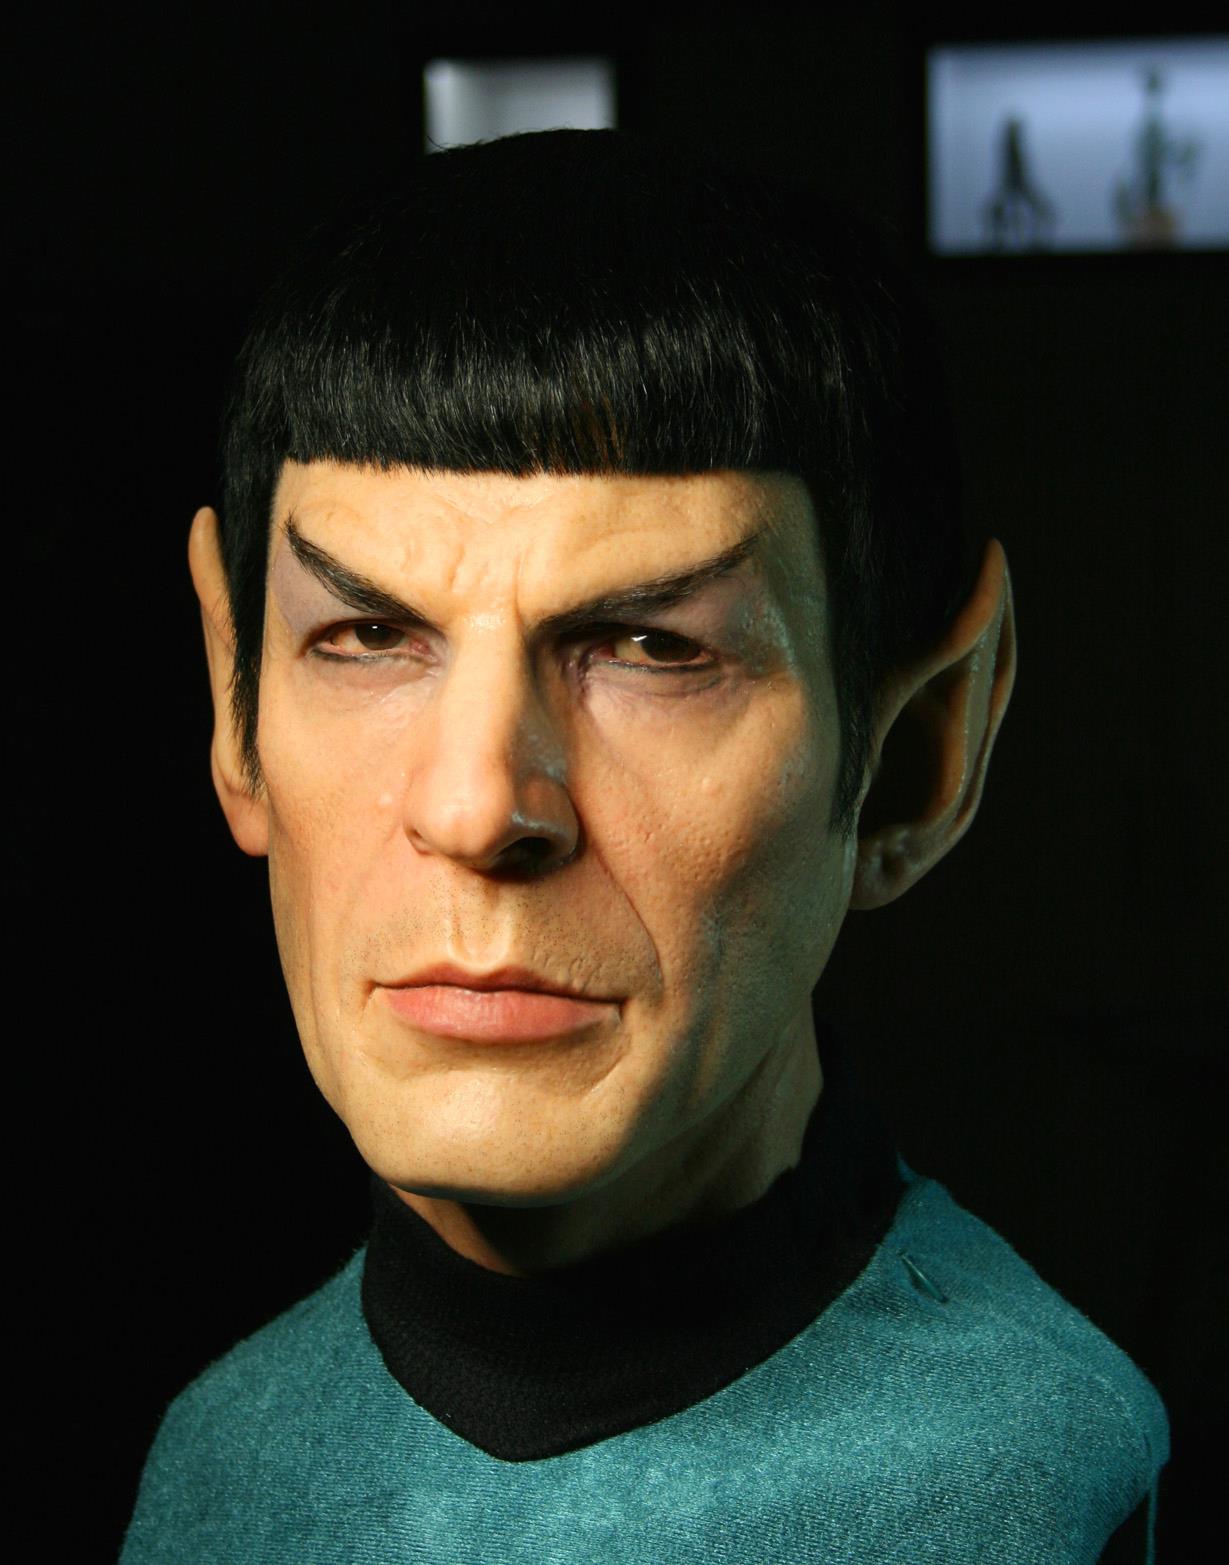
Guardian, oil on panel, 12×16” (above)
This one started as an abstract mark-making demo for a class I teach at LAAFA. The panel was primed with a texture of acrylic heavy body titanium white onto a gessoed panel. After that dried, I applied a mixture of burnt umber oil paint and liquin with a utility brush, covering the entire surface of the panel and then carved out marks with a spatula. The heavy body acrylic forms a texture that is raised in some areas and the next layers of paint catch on and create added texture to the marks that are being made. You can see this effect especially in the two sections of the upper portion of the panel. The image I ultimately ended up with was initially something I saw in the marks from the beginning, and as always, as I go, each layer and direction of where I go next is guided by what happens in the previous layers and marks to eventually become the finished painting.
_________________
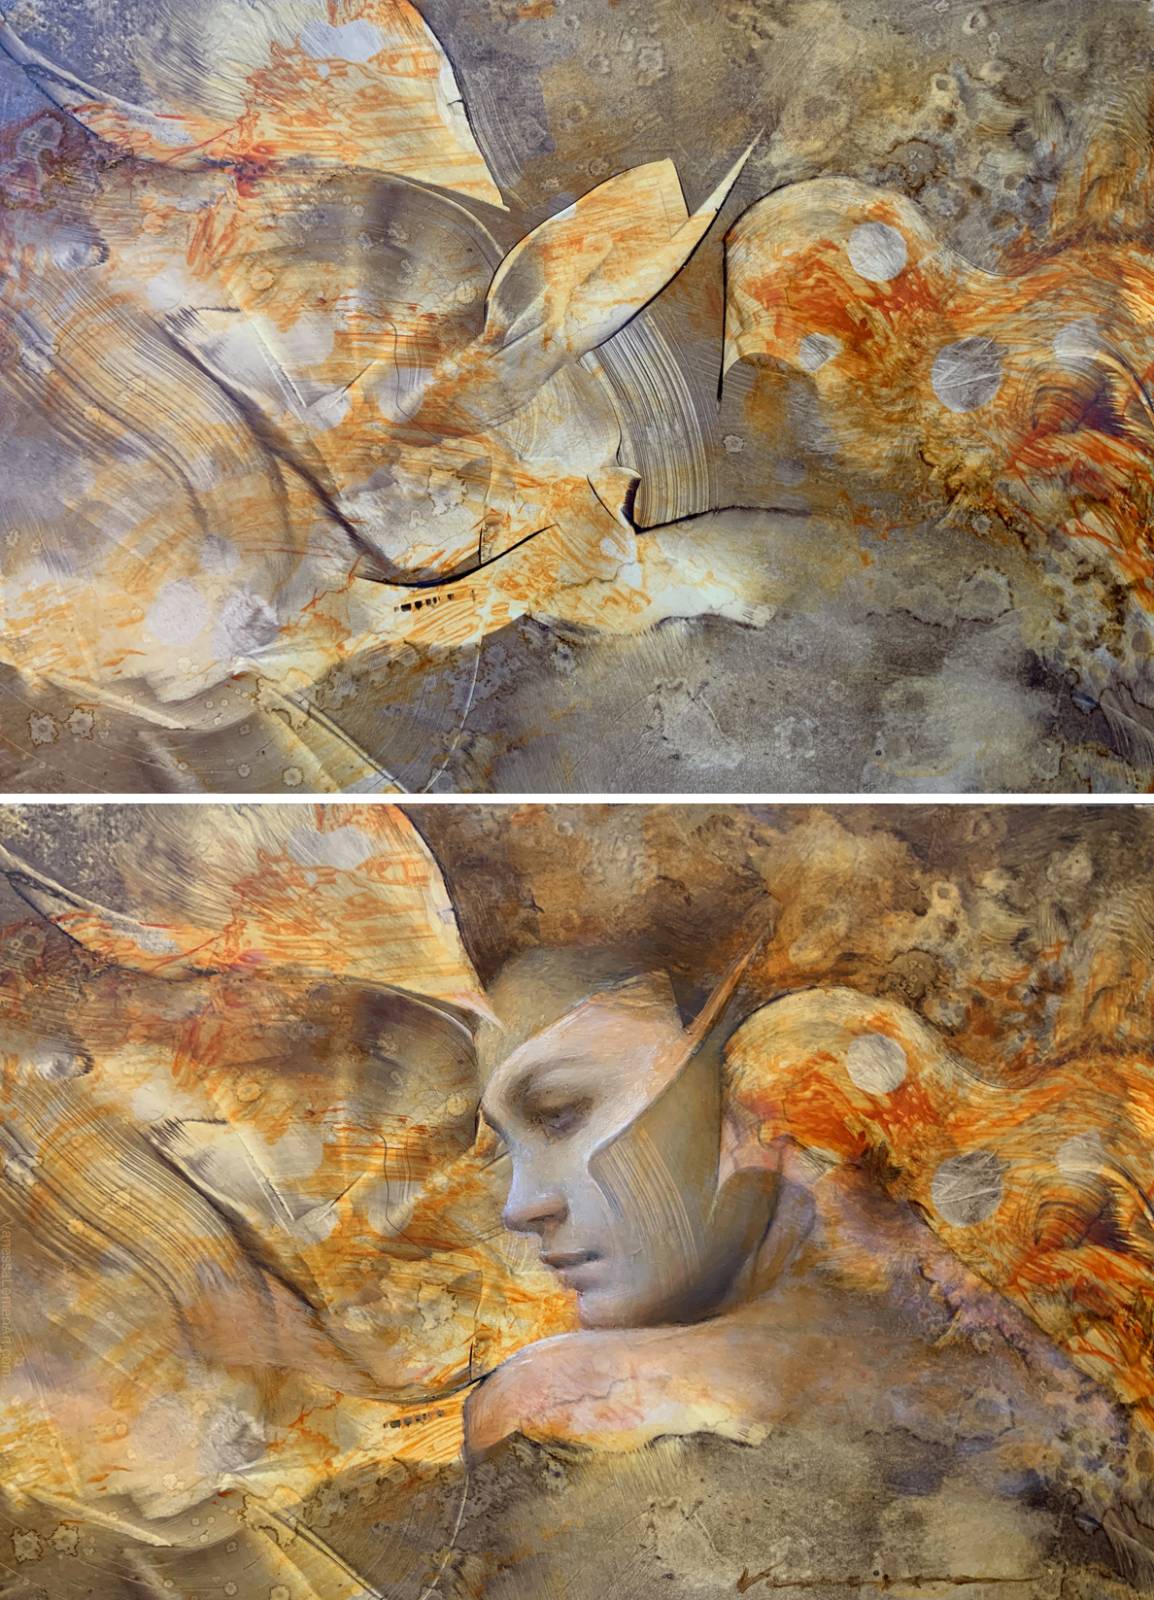
Talma, oil on panel, 5×7” (above)
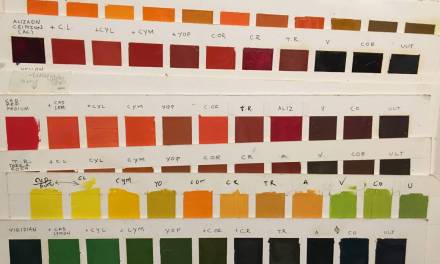
This little painting was initially part of a run of small mark-making experiments. I made marks in Transparent Gold Ochre and Transparent Red Iron Oxide in oil at first and when that first layer dried, I added the second transparent layer of a mixture of Burnt Umber and Blue to create the dark grey areas, with mark-making again using spatulas to carve and manipulate over the top of the dry gold and orange underpainting which is what you see in the top example. I saw the gesture of the face and shoulder in the marks, along with a faint profile slightly farther to the left or in front of the face. The face painted in the finished painting was guided by the placement of the mask-like shape that the face fits in in the finish and the dark edge that stood as a rough indication of the chin as it is tucked into the shoulder in the marks as well. I liked how the other faint face seems to serve as a ghosted indication of movement, but also as folds and ripples in the surroundings as well.
It’s pretty interesting to go back and compare starts and finishes of the paintings. Even though my paintings really tend to shapeshift quite a bit over the time they’re created, with the comparisons side-by-side, you can still really see some of parts of the original underpainting that informed what came next and ended up in the finished image too. While I’m working, I tend not to stop and take many photos or video as that can often interrupt the flow of the painting experience for me. If and when I do stop to take a photo, it’s usually at a stopping point in the day, and even then, I don’t tend to look at the photos all too much except at a later time such as this or sometimes when compiling for a process video. Though I do have a process that is rooted in indirect painting techniques overall, each painting is different in their own way, and I am always gaining something new along the way. I hope these few starts and finishes have lent some insight into the development of the work.
If you’d like, you can also check out a previous article I’ve posted here on Muddy Colors called “Bloom” for more information and images regarding my Bloom solo show and other paintings I created for it.
Recent Comments