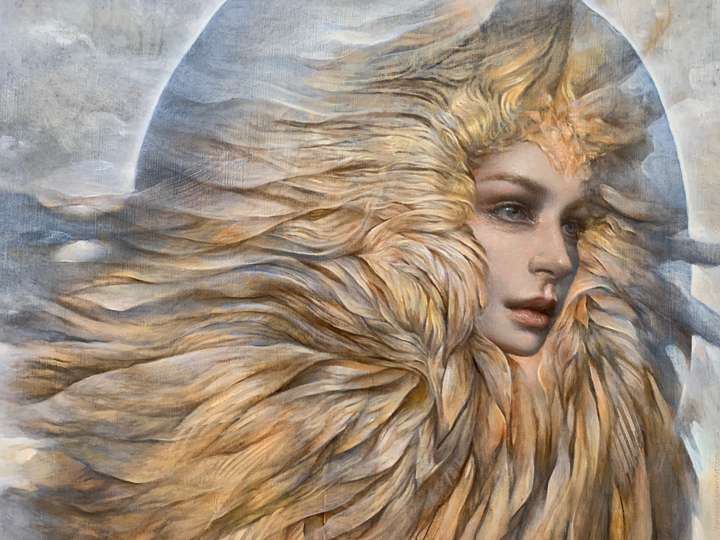
“Leona” (detail), oil on panel, 18 x 24”
A while back, I posted Part 1 of the process of this painting and I’d been meaning to share the finished painting with another video of a bit of the process as well, once I finished it. This painting was painted from imagination and built up in layers, with time in between for drying and also for working on other work over the year.
Here is Part 2
Here is Part 1 below in case you’d like to see them both in the same place:
If you’d like, you can read more about Part 1 by clicking on this link to the article I posted here on Muddy Colors a while ago: Painting Leona / Process Video and Notes (Part 1), which goes over how the painting was started from the very beginning, and what tools I used to create the abstract marks that inspired the rest of the painting in its finished state, and more..
Here are some notes for Part 2:
The video starts off showing a detail of the face, while I’m adding small brushstrokes with a small round. This is typically how I build up a rendered area, using small marks within a larger space, weaving color and pigment in somewhat of a cross-hatching kind of application to create a buildup of texture of, in this case, skin. Using a small brush in this way gives an effect that reads like skin does more than smoothing out completely to leave no trace of texture at all.
Starting around 00:13, I use mops to soften the outer atmospheric areas of the painting. At this point, the painting is still very much in the earlier state in the outer areas, and you’ll see as the video progresses that there is quite a lot more built up from this point on in terms of the layering and adding of more information. As you can see around 00:15, as I add another layer of paint that I will then pick out of and continue to do the same sort of thing from this point until the finish stages.
At 00:16, I’m adding small marks with a sable filbert that give definition and to emphasize areas of light on the headdress surrounding the face. I basically continue to do this in the following seconds of the video in various areas of the painting. These marks are added to direct to eye to the focus (face). I use small filberts, flats and rounds to add details as I build up the forms throughout the composition.
At around 00:38, I’m using a very small mop to add some soft marks in the face as the paint is slightly dry (no medium added). This adds some cohesion of strokes in that area. I use various sizes of mops to add the same sorts of brushwork and softening to other places around the entire painting. I also go around with a round, touching up edges in a few areas too and laying in harder edged strokes strategically where I see the use for that, leaving some areas to be less hard-edged to create depth and focus.
The rest of the video pans across different areas of the painting to show the finished painting in segments in order to show the different kinds of effects created from the different brushes.
A couple of the shots throughout this video show the edge of this panel which is a honeycomb type of construction. This panel is extremely lightweight and durable. This particular panel is the AllinPanel 537 by Artefex, which is a fine linen canvas adhered to an aluminum substrate. It was fun to paint on and not too absorbent, which lends itself to be a great surface for the initial mark-making and pickout as well as building up thin translucent layers. The slightly thicker mixed-pigment layers were also very nice to add on this surface as well.
I hope some of this info helps and I hope you enjoyed seeing these videos of a glimpse into my painting process.


Recent Comments