The painting process I use for oil painting is called indirect painting. This means that I use multiple layers to achieve the final result, letting each layer dry in between. I maintain (relative) control of what’s happening on the canvas, but it also allows for the possibilities of special effects where I use different amounts of opacity, transparency or removal of the paint to reveal the layer below.
Throughout my painting life, there are a few tools that have really made a significant impact on my process and results. The first one I’m going to feature is the thing I get asked most about in a lot of my painting videos: The Wipeout Tool
What Is It?
It’s a paint manipulation tool! Dual rubberized tips, one is a wedge (kind of like a squeegee) and the other is pointed.
The Undo Button for Real Life
All painting is improvisation. You have to make a decision, look at that decision, and then decide if you like it. In oil painting, a small change can often be made with the addition of a new color or value. However, the more paint you add, the more unwieldy that paint can get!
While oil paint stays moveable the whole day, this can be a “pro” or a “con” depending on what you are doing. In this case, it’s a big PRO. If there’s too much paint gunking up my surface, or I need to make a major adjustment to what I’ve done so far, I just use the wedge tip to remove the offensive paint and start fresh. Unlike wiping away with towels or a clean brush or a sponge, the wipeout tool gives me total precision when correcting mistakes. So go ahead and put that paint down!
DON’T BE AFRAID TO MAKE MISTAKES! Doing the wrong thing is better than doing nothing.
Paint Manipulation
This tool is a game changer when it comes to creating text or intricate designs, but I use it for many other effects as well. It doesn’t really leave any real residue of the paint where you removed it. I’ve tried other fine detail tools that were a bit too wimpy and they kind of smeared the paint off rather than really moving it. I also use panels so if you’re using stretch canvas, it might work a bit differently or you may need to use some additional pressure. If your surface is VERY textured, you may find it leaves some paint in the grooves of your surface (which might be a good thing!)
The pointed tip is used like a pencil. I like to use it to:
- carve into edge of wet paint to mimicking chipping paint.
- push those pesky ellipses around that won’t behave
- Make a thick line thinner
- Dig into a solid area of wet paint to add variety and artifacts
Example 1:
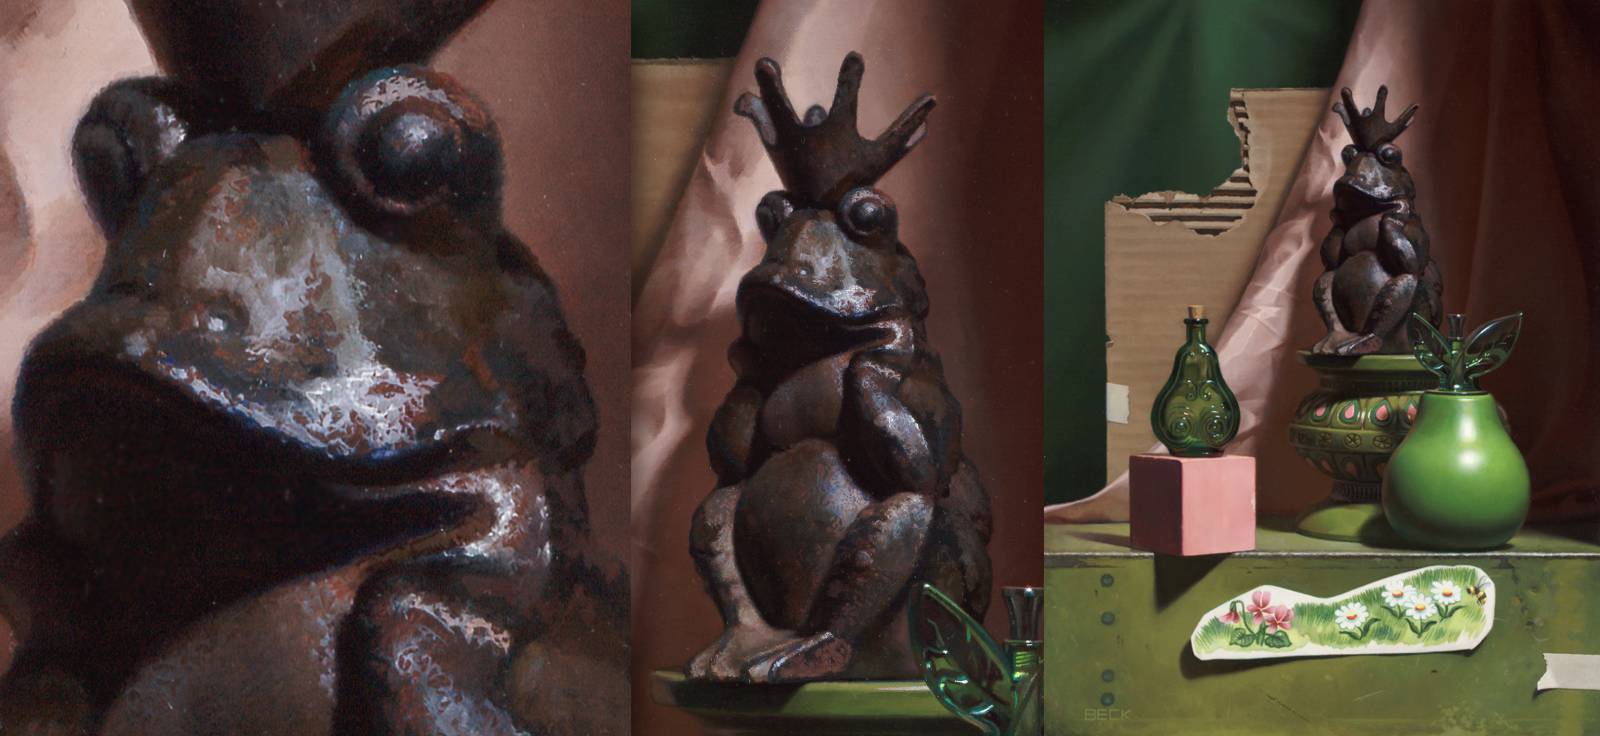
For a cast-iron effect, the first layer goes in darker than you want. Let that dry and then place your lighter highlight values on top. Dig into that lighter paint with the pencil side of the wipeout tool to reveal the darker more colorful layer below.
Example 2:

In the red hair, my first layer of bright red was very light and very chromatic. Almost neon red! After I let that dry, I glazed on a dark reddish brown completely over the whole hair. The pencil side of the wipeout tool can now dig into that dark glaze and reveal those nice bright red highlights.
The wedge side can be used to:
- drag and create wood grain effects
- Sharpen up an edge in a linear way
- Undo button!
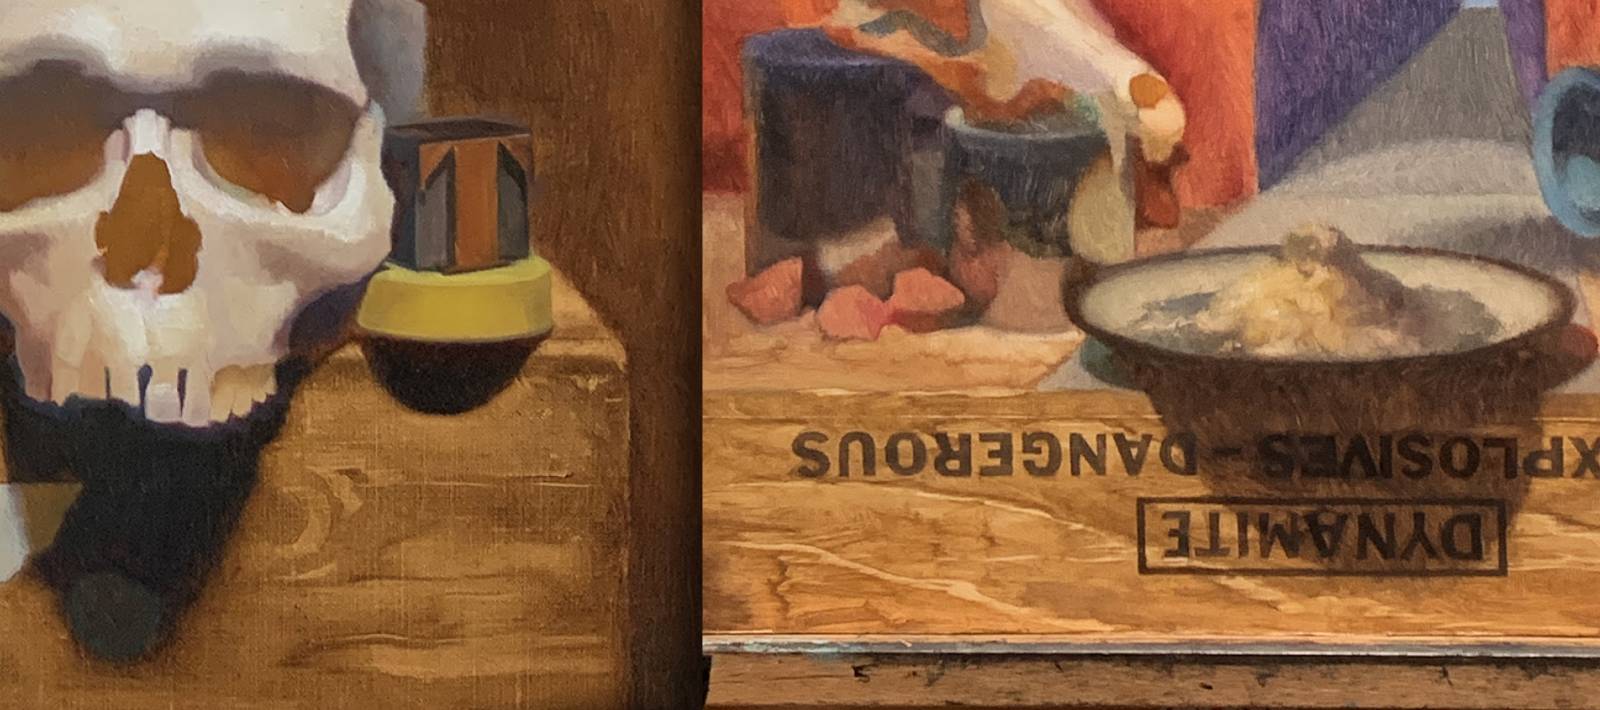
I like to scrub on a bunch of thin paint and then use the wedge side to drag and collect paint to simulate the underlying grain of wood.
Love Those Edges!
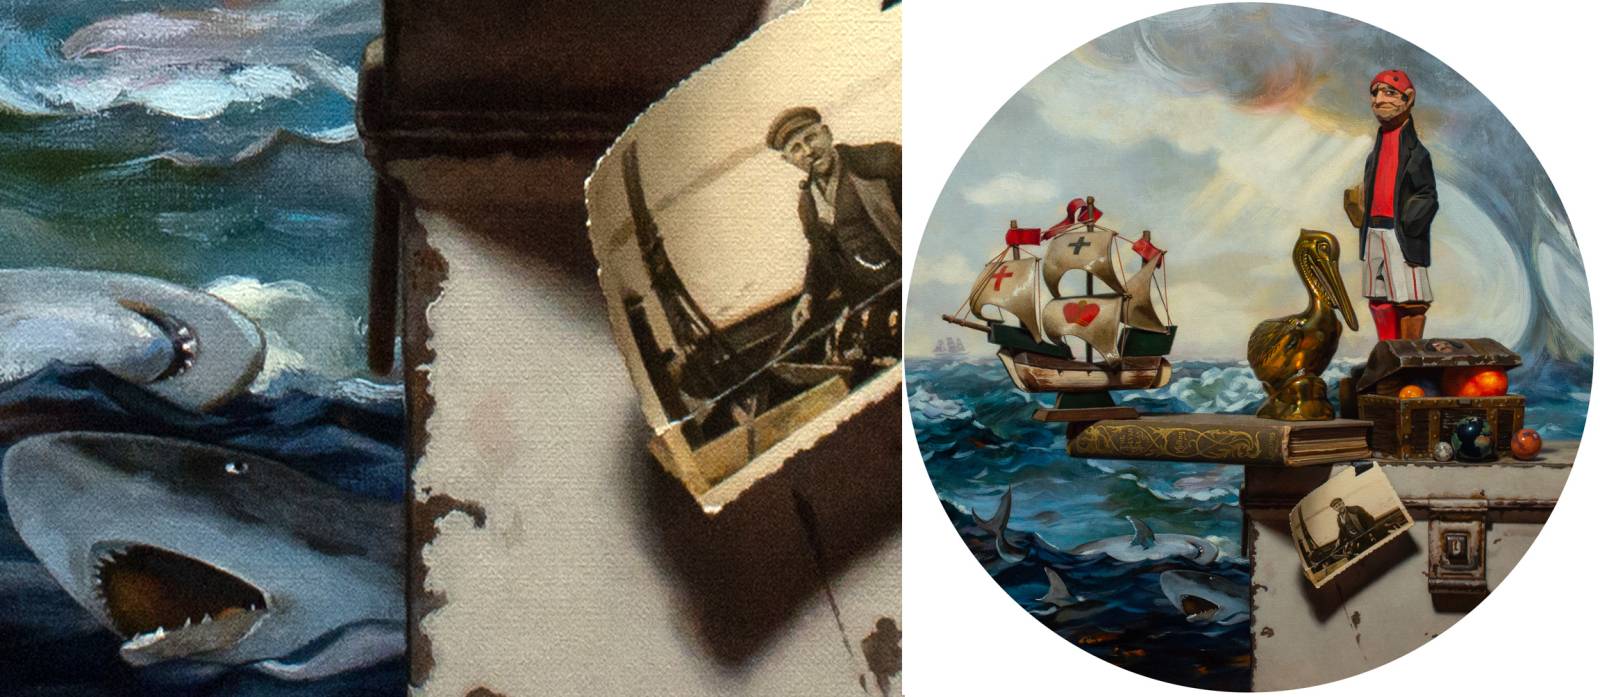
The edges of the white paint on the box along with the crisp edges of the photo were both done using the pencil side of the wipeout tool. I can put approximate paint down and then move it around on the surface.
Both ends are great for also just pushing those paint particles around the surface. Use different pressures to see what happens and see what effects you come up with!
Text and intricate designs
By far, my favorite use for the wipeout tool is creating lettering. Time and time again, I find it the ideal tool to shape letters and words. By simply blocking in and strategically removing paint, recreating fonts, scripts and designs work has never been easier or more satisfying.
I have a Gumroad video on creating elaborate designs or text in oil paint where you can see how this tool comes in handy. Because you are all my Muddy Friends, I will give you the free handout here. Painting is already hard enough, so I want to share the tools that make it easier. The wipe out tool is one of them.
Interested in trying it for yourself? Trekell gave me a Muddy Colors Promo Code ( Beck20 ) and it’s good for 20% off through March 8th. I also exclusively use their brushes because the brushes AND the people who run it are awesome. Pick one up and let me know what you think.
Happy painting!
Videos of this tool IN ACTION:
- General Wipeout tool action.
- Text development.
- More text.
- Using it as an eraser and also to create textural effects.



Thanks Julie, I have those rubber brushes but I never put them in use. Now I know what I could use them for!
They are really fun to play with!
Julie…Fun tool…just a heads up…The discount code is not working…says could not be used with existing discounts…not sure what that means since it was the only thing in the cart and I have no “existing discounts” applied.
Thanks for letting me know! I’ll reach out to them.
Hi, Julie.
Very interesting and helpful guidance.
Thank you very much.
Hi Julie!
Thank you for the article! I’ve been looking for ways to experiment more in my work and picked up some wipeout tools this weekend. Unfortunately the Trekell shipping cost to deliver to Scotland is pricey!! So trying out a few tools from my local store first.
Exploring favorite tools? The Wipeout Tool stands out for its versatility and efficiency. From erasing unwanted elements to enhancing precision, it’s a game-changer. While perfecting your craft, consider how much does it cost to market a book, ensuring your literary masterpiece gets the attention it deserves in the competitive landscape of publishing.